Reupholstering a Crapaud armchair
The specifics of renovating a Crapaud armchair
Presentation of the Crapaud armchair
Characteristics of the Crapaud armchair

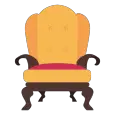
A Crapaud armchair has a stocky shape set on short legs that gives it the look of a frog ready to jump. Here are its main characteristics:
- a squat shape gathered on short legs that gives it the appearance of a frog ready to jump
- traditionally rounded and wide seat
- low curved and enveloping backrest, often padded at waist height to increase comfort and with a slightly backward-curved upper part
- mid-height legs, generally cambered
- fully covered, with no visible joinery and often decorated with trim
History of the Crapaud armchair
It was designed during the first half of the 19th century under the reign of Louis-Philippe and adapted to the Napoleon III style.
It is the first armchair to so closely follow the shape of the back; one could even say it is the ancestor of the automobile bucket seat.
But it has remained timeless through the ages without losing comfort, knowing how to fit anywhere thanks to its small volume.
However, it is reputed to be the bête noire of upholsterers because it is complex to eliminate fabric wrinkles on this armchair with multiple curves.
Presentation of the Crapaud frame

How to reupholster a Crapaud armchair? Tutorial
We will assume that the padding of the seat of the armchair has already been completed following the procedure below:
- Full stripping
- Restoration
- Webbing
- Springs on webbing
- Spring lashing
- Hessian seat
- Lacing and vegetable horsehair installation
- Wrapping and marking
- Tucking down & foundation stitches
- Seat tacking
- Lacing and animal horsehair installation
- White lining
- Cotton batting installation
- Fabric installation
We can now present the specific procedure for padding the backrest of a Crapaud armchair, which includes the following steps:
- Installing the hessian
- Installing the horsehair and calico on the lower part of the backrest
- Installing the animal hair and white cloth on the lower part of the backrest
- Installing the horsehair and calico on the upper part of the backrest
- Installing the animal hair and white cloth on the upper part of the backrest
- Installing the cotton wadding and finishing fabric on the lower part of the backrest
- Installing the cotton wadding and finishing fabric on the upper part of the backrest
- Closing the backrest
Note: To avoid overloading the diagrams that follow, the seat is not represented.
1st step: Hessian


Installing the hessian #1
Develop a strip of hessian inside the frame, make Y-shaped cuts at the feet of the uprights, cut the cloth again leaving 2 to 3 cm to fold it over the edge of the backrest toward the front of the armchair.

Installing the hessian #2
Tack the hessian on the uprights on the front face then on the outside of the armrests horizontally, return to the front face following the curve of the front cross before finishing vertically.
Sew the hessian to the lower hoop with festoon stitches.
2th step: Calico on the LOWER bump and on the armrests


Upholstery canvas - Lower backrest of the chair
- The vegetable hair is held on the strong canvas by vertical ties.
- First, the underlining cloth is positioned with temporary upholstery tacks before being sewn
- The entire tuft can be anchored to the strong canvas with vertical bottom stitches.
- The upholstery canvas is sewn onto the upper reed with festoon stitches at the top and folded down and sewn at the bottom onto the strong canvas, on the back side of the backrest.

Upholstery canvas - Armrests
- Perform the same work on the armrests by fixing the upholstery canvas in the same way as on the backrest.
- Sew together the upholstery canvas of the backrest with those of the armrests.
3th step: White canvas on the LOWER backrest and on the armrests


White canvas - Lower backrest of the chair
- The animal hair is held on the upholstery canvas by vertical ties.
- First, the white fabric is positioned on the front with temporary upholstery tacks before being sewn.
- The white canvas is sewn with festoon stitches onto the reeds at the top and folded down at the bottom to be sewn onto the strong canvas, on the back side of the backrest.

White canvas - Armrests
- Perform the same work on the armrests by fixing the white canvas in the same way as on the backrest.
- Sew together the white canvas of the backrest with those of the armrests.
4th step: Upholstery canvas on the UPPER backrest and on the armrests


Upholstery canvas - Upper backrest of the chair
- The vegetable hair is held on the strong canvas by vertical ties.
- First, the upper padding cloth is positioned with temporary upholstery tacks before being permanently secured.
- The entire tuft can be anchored to the strong canvas with vertical bottom stitches.
- The underlining canvas is sewn at the bottom with festoon stitches on the upper rail and tacked at the top and on the sides with upholstery tack, on the front uprights of the armchair.
Upholstery canvas - Armrests
- Perform the same work on the armrests by fixing the upholstery canvas in the same way as on the backrest.
- Sew together the upholstery canvas of the backrest with those of the armrests.
5th step: White canvas on the UPPER backrest and on the armrests


White canvas - Upper backrest of the chair
- Animal horsehair is held on the underlining fabric by vertical laces.
2. First, the white fabric is positioned with temporary upholstery tacks before being permanently secured.
3. The white fabric is sewn onto the canes using feston stitches on the upper cane and fastened with upholstery tacks on the back uprights of the armchair.
6th step: Finishing fabric LOWER backrest


Finishing fabric lower backrest #1
A half thickness of wadding is placed on the white fabric.
First, the finishing fabric is secured with temporary upholstery tacks over the wadding.

Finishing fabric lower backrest #2
The finishing fabric is sewn onto the upper rail.


Finishing fabric lower backrest #3
At the bottom, the finishing fabric is secured with tacks before being nailed to the belt.

Finishing fabric lower backrest #4
The finishing fabric will then be sewn onto the white canvas of the armrests.

7th step: Finishing fabric for the UPPER hump & Armrests

To achieve this result, some preparation is needed: cotton batting, pattern, cutting, piping.

Cotton wadding
Place a half layer of cotton batting on the white canvas of the upper hump.

Pattern
Make a pattern of the upper hump (shown in yellow in the photo above), using a piece of white canvas pinned over the cotton batting. Mark the position of the middle rail at the bottom with a marker (red here) following the fold of the rail. Cut the pattern leaving a margin of approximately 4 centimeters from the red mark and the top of the backrest.
Cut the finishing fabric according to the resulting pattern.

Making piping
Make simple piping on the fabric using guinder cord. The seam follows the line marked on the pattern.


Seam
Position the finishing fabric on the upper hump by securing it with tacks. Sew the bottom of the upper hump fabric onto the middle rail flush with the piping cord.


Back nailing
Nail the finishing fabric onto the uprights of the chair on the back side of the backrest.
Secure the ends of the guinder cord onto the upright of the chair.


Armrests
1. Do the same work on the armrests by securing the finishing fabric in the same way as on the humps.
2. Turn the finishing fabric over and adjust the fold at the junction of the armrests with the humps. It is generally not necessary to make a seam.
It is necessary to imagine the presence of the seat that we had removed from the previous diagrams for greater clarity.
8st step: Closing the file

Upholstery back
Place a half thickness of wadding on the back of the chair back and the outside of the armrests.

Chair back fabric
Tack then staple the finishing fabric on the back of the chair back and the outside of the armrests.