Reupholstering an armchair in the traditional way
How to cover an armchair yourself?
Did you just pick up an old armchair where your seat is sinking dangerously while being cruelly poked by aggressive springs? Yet you do not want to throw it away and you cannot afford the services of a professional (who are becoming increasingly rare and therefore increasingly expensive...).
A possible solution for meticulous and patient DIYers, with time and space available in a place somewhat isolated from sensitive ears: restore and upholster an armchair yourself.
Note : you may develop a personal addiction and then be overwhelmed with restoration requests if you boast about this activity to your circle!
The 15 steps of reupholstering an armchair
You will find below the list of the different steps to follow, in order, to reupholster an armchair.
The basic technique of this tutorial is applicable to any type of armchair: Crapaud armchair, Voltaire armchair, Club armchair, Louis XVI armchair or even a chair...
Each step is detailed and illustrated precisely, with the necessary upholstery tools so that you can carry out this work yourself. An upholsterer's lexicon is also available to help you understand all the technical terms of decorative upholstery.
1. Full stripping
In this step, you may feel the thrill of destruction, which you must resist.
The goal is to remove everything attached to the wooden frame. During this “autopsy,” you will encounter several tricky points:
- Remove decorative nails without causing splinters or marks in the visible wood of the seat…
- Dealing with staples that may hold the fabric under the nails… some amateur restorers sometimes get carried away by electric stapling and produce an excessive amount of elements that are very difficult to extract.
- Remember to wear a mask to protect yourself from the dust accumulated over the years between the different canvases, in various horsehairs, or worse… caused by the decomposition of modern foams…
It is strongly recommended to memorize and, if possible, document (taking photos is a good idea) how the previous upholsterer proceeded through the different stages of their work as they encountered the layers.
The steps are therefore the reverse of the upholstery process that will follow: fabric and jacquard / wadding / white canvas / animal hair / burlap canvas / vegetable fiber / strong canvas / binding cord / springs / strap .
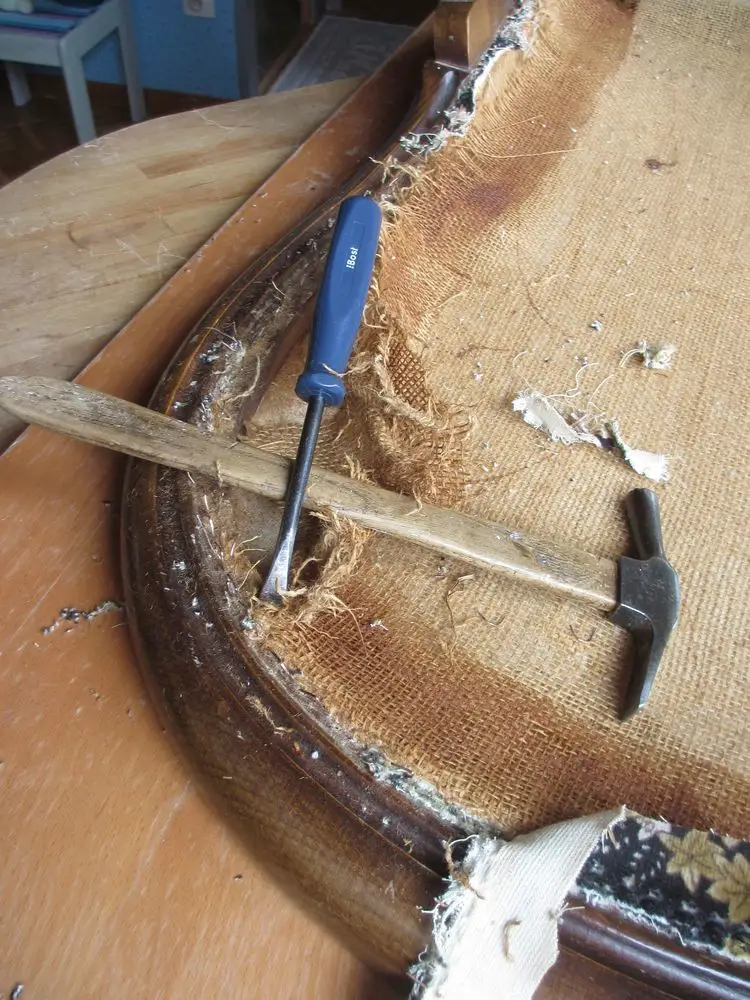
Stripping #1
Use a Tack Stripping Lifter
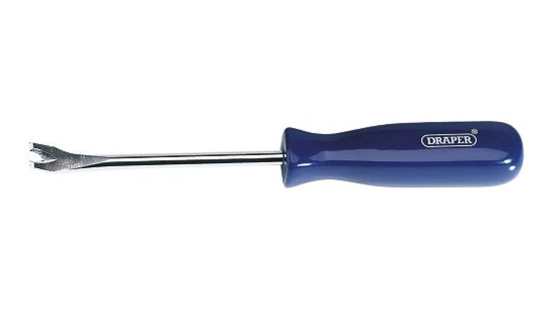
Draper 64804
195mm Tack Lifter
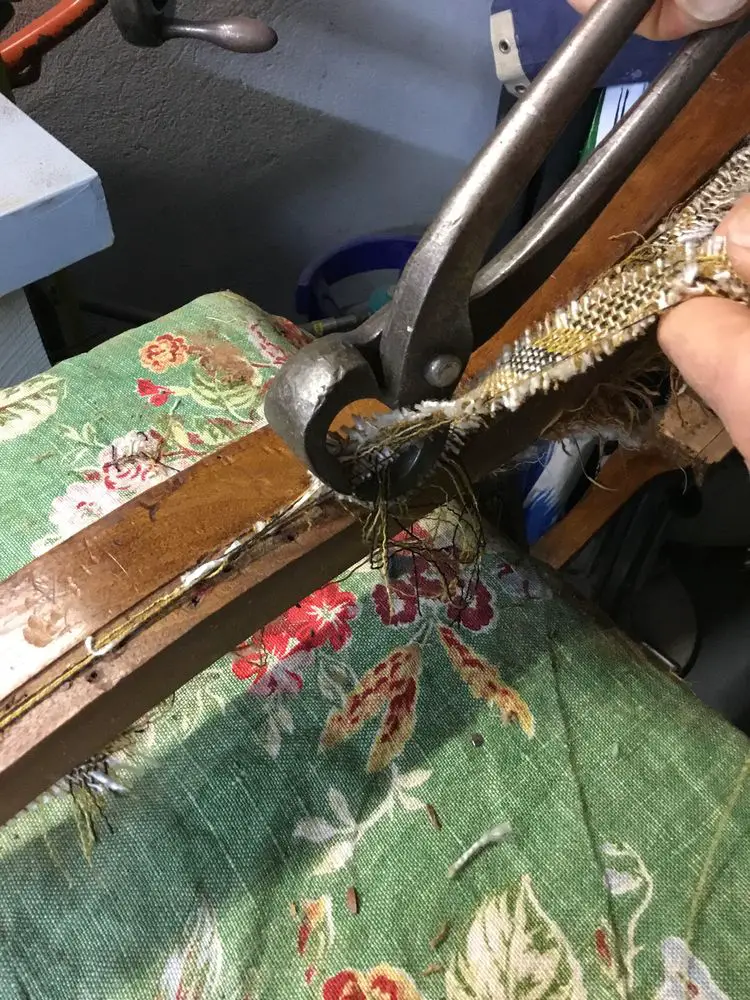
Stripping #2
A good heavy pair of pliers pliers can help

CON:P CPT100200
Varnished carpenter's pliers
200 mm
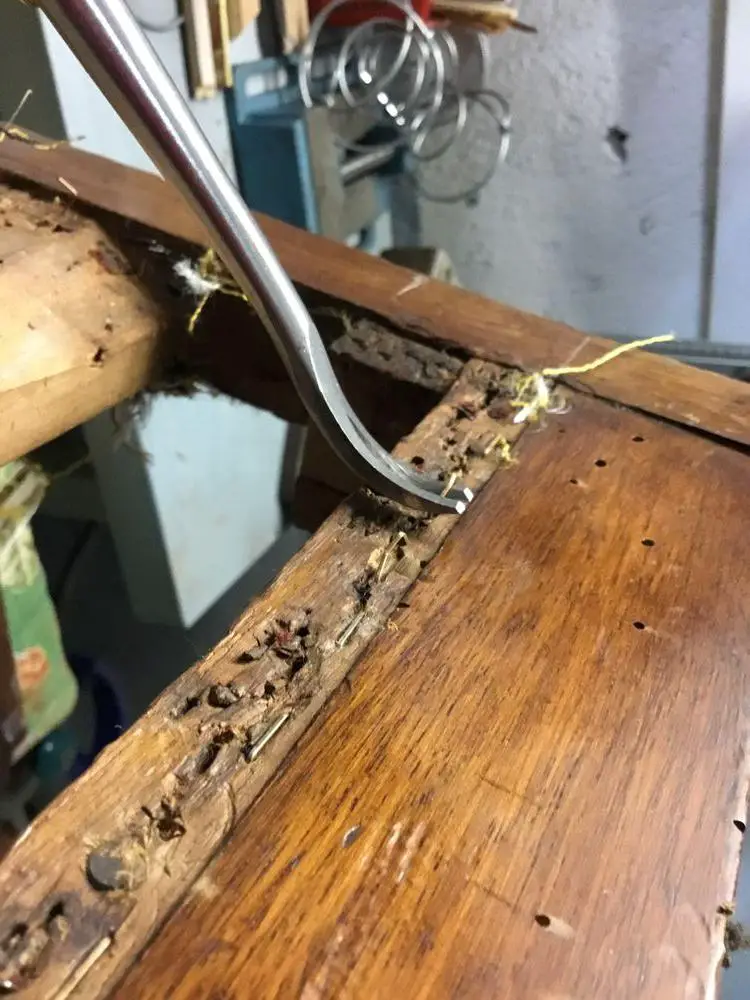
Stripping #3
There is a technique to learn for removing staples.
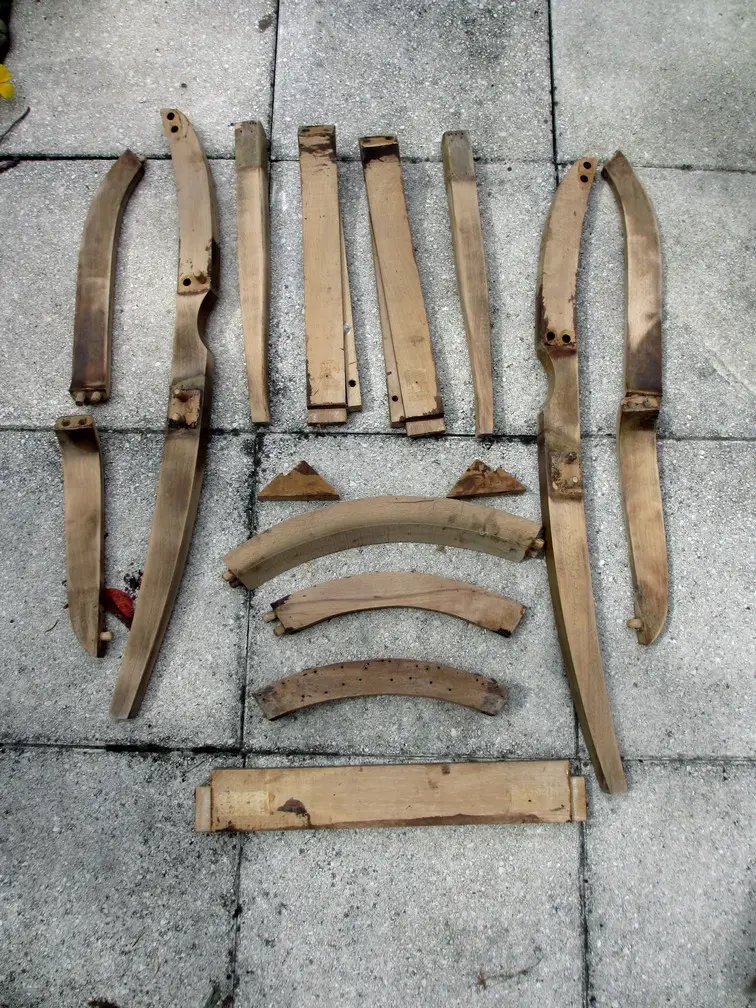
Stripping #4
For sanding the wood, make sure to use quality abrasive tape (I recommend this one ). Grain 40 to 180. If you have to choose only one, take grain 80, the most versatile.
Tip: Do not hesitate to scrape "down to the bone"!
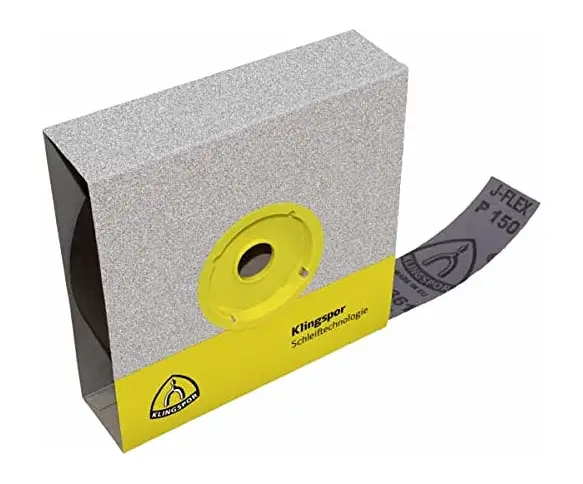
Klingspor Abrasive Roll
25000 mm Grain 80
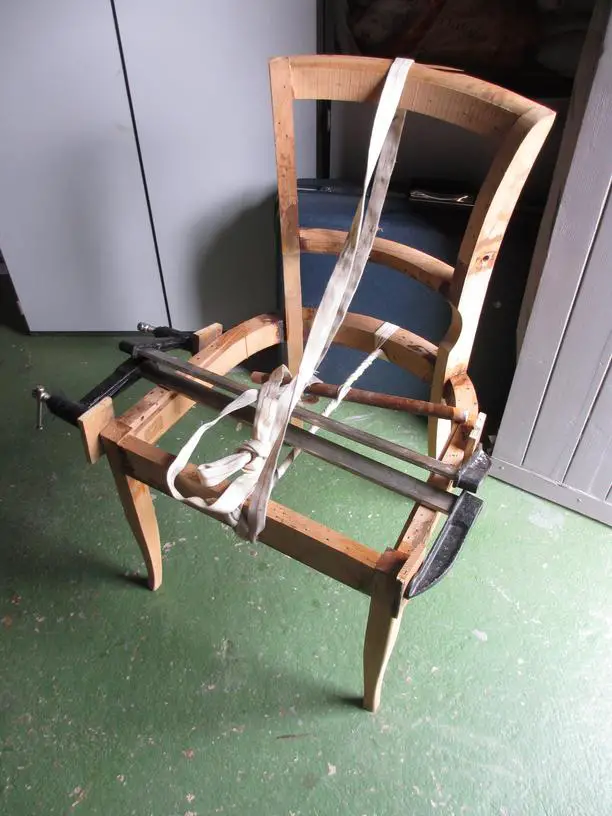
Stripping #5
Do not forget the strap and the old-fashioned turnbuckle.
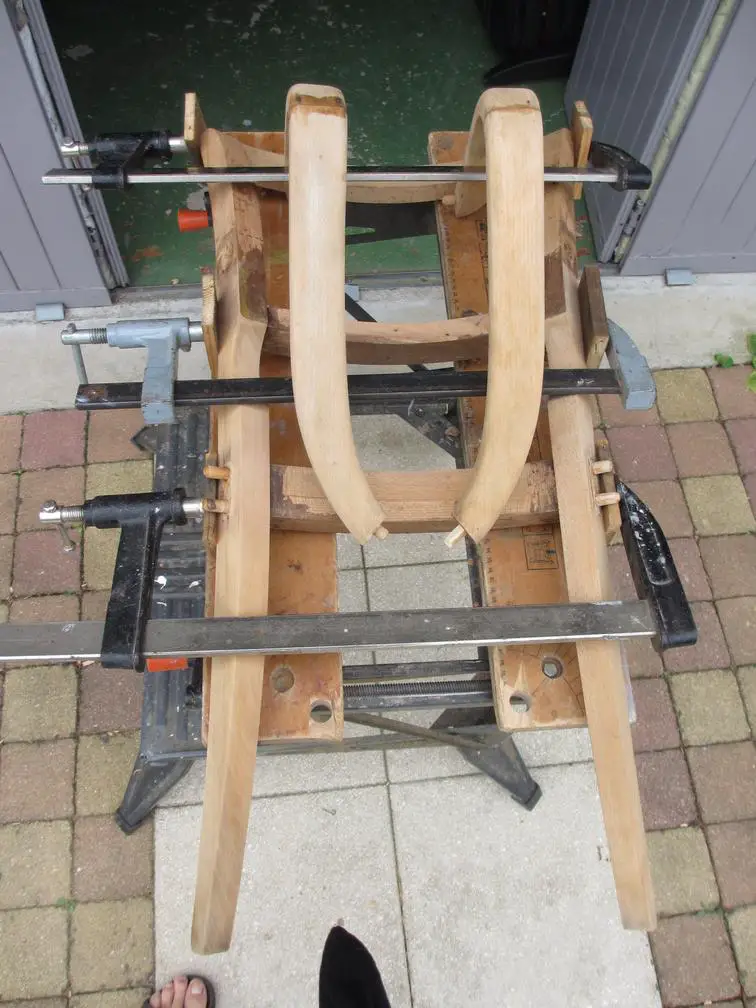
Stripping #6
Very useful table vise and a full set of clamps. Good gluing means good clamping!
With Nordin Brothers fish glue, the most effective one with a bearable odor. Be careful to respect the drying times!
Tip: If necessary, heat the glue in a water bath and the wood on a cast iron plate.

Fish Glue
by Nordin Brothers
2. Restoration
The smells of fish glue, dust, sanding, and sawing mix here with those of varnish and resin treatment products.
The objective here is to repair the damage time has inflicted on the frame. There is no need to panic, as there are products and techniques to repair all accidents that have occurred:
- Fill seed holes or other holes with wood putty
- Treat insect holes from wood-boring insects
- Replace damaged dowels or brackets
- Reglue or redo some mortise and tenon joints
- Reglue or replace a broken or rotted leg or upright
You must know how to invest time and care in sanding to properly achieve the patina or varnishing often required.
It is often necessary to refresh the bevels of the belt so that the webbing can be attached more easily
Do not forget to protect the fragile parts of the restored seat with bull-pack or similar material, as it will undergo many manipulations later.
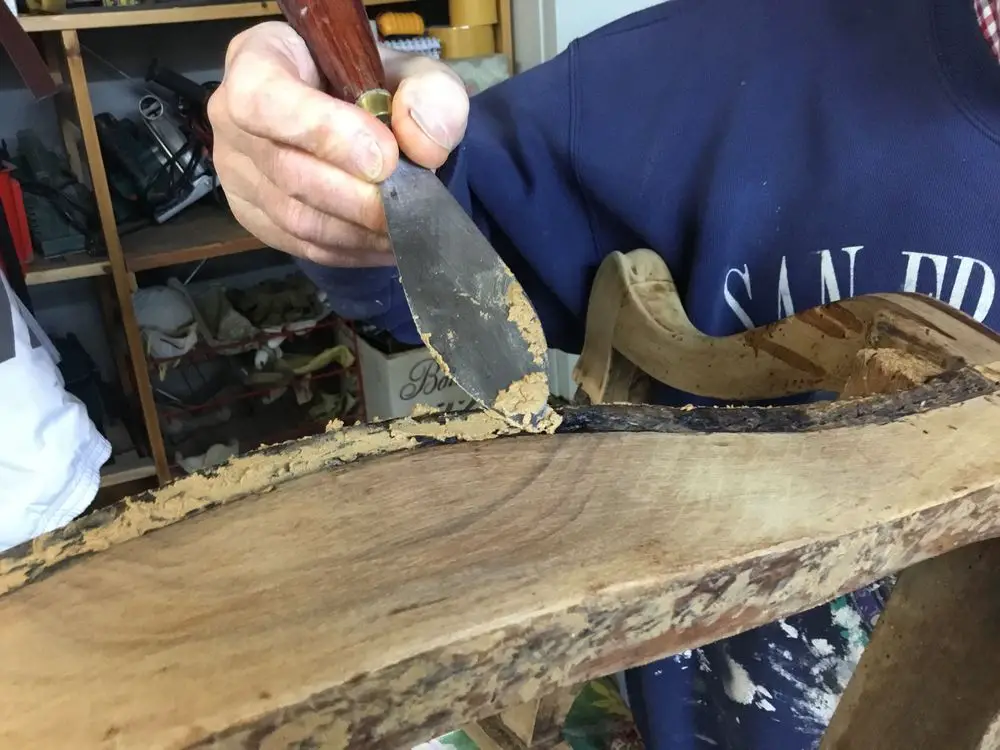
Restoration #1
Fill the holes and defects in the wood with wood putty.
Tool and Consumable :- Mastic Knife
- Wood Putty (the best: Nordin Brothers' wood mastic )
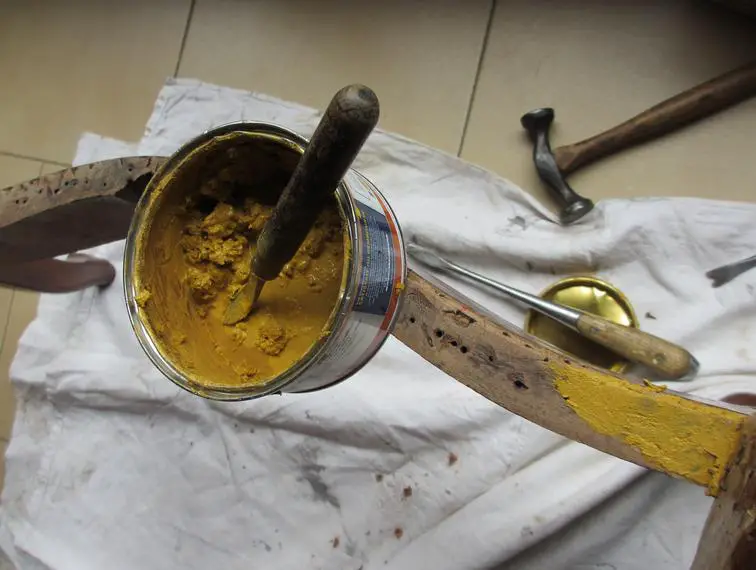
Tip: Clean with a damp sponge before complete drying.
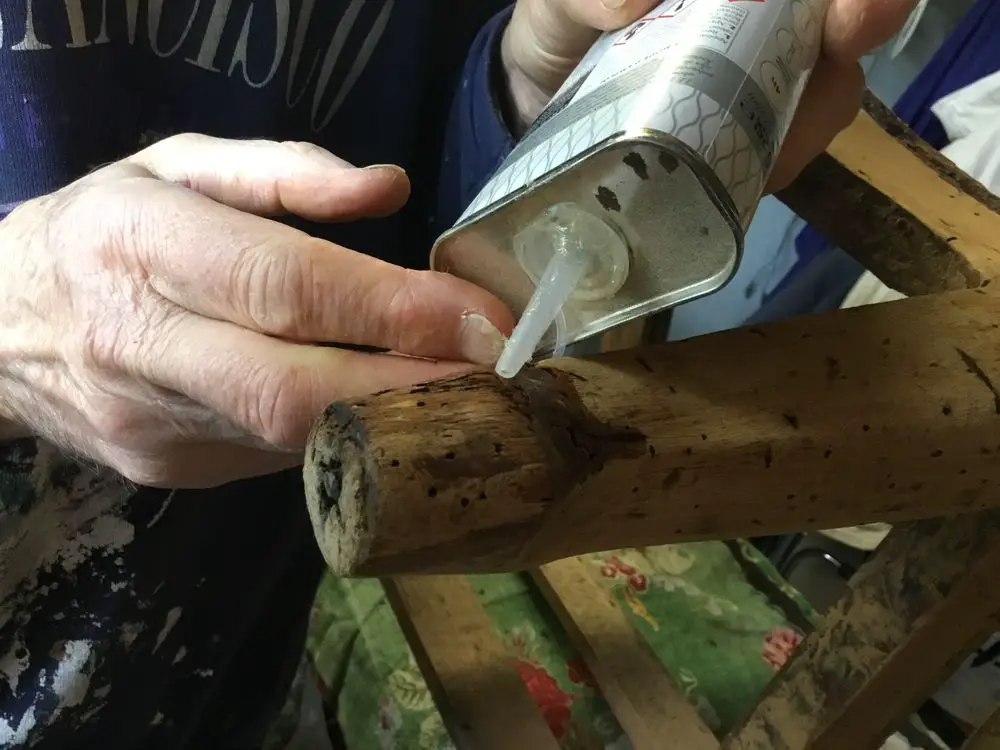
Restoration #2
Treat the insect holes
Consumable :- Resin for consolidating powdery wood
Warning: Beware of the solvent smell!

Libéron Hardener
for powdery wood
Colorless, 250 ml
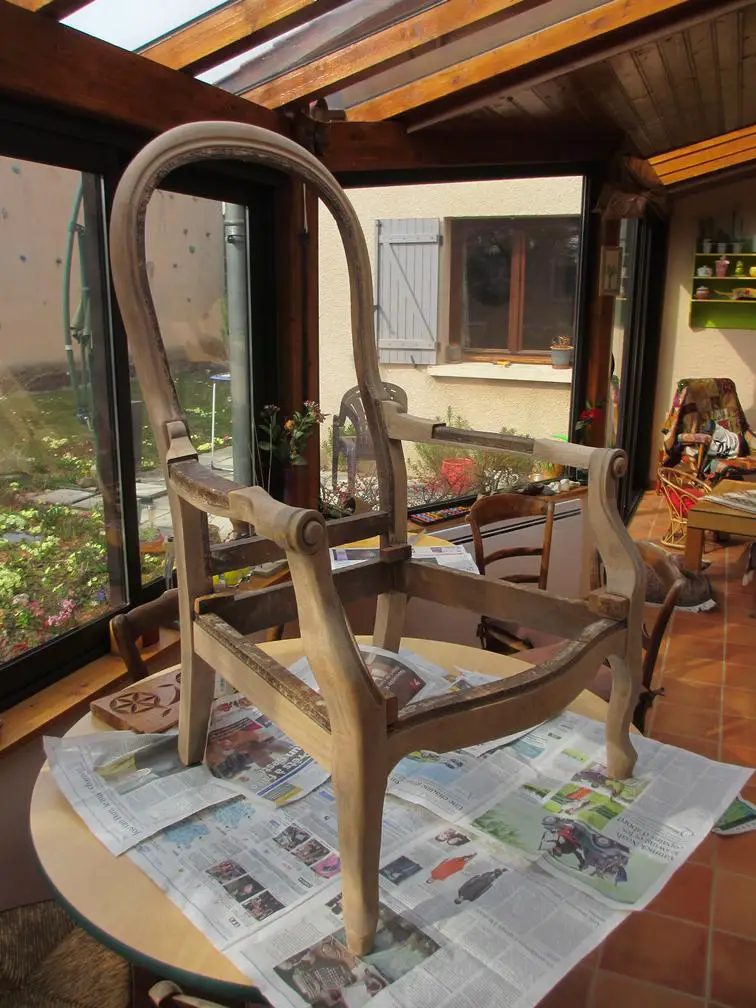
Restoration #3
Final sanding and anti-xylophage treatment
Consumables :- Anti-Xylophage in aerosol or can format

Xylophene
Furniture, objects and parquet
Colorless, 400 ml

Arcane Industries
Anti-insect treatment
for wood, 1 L
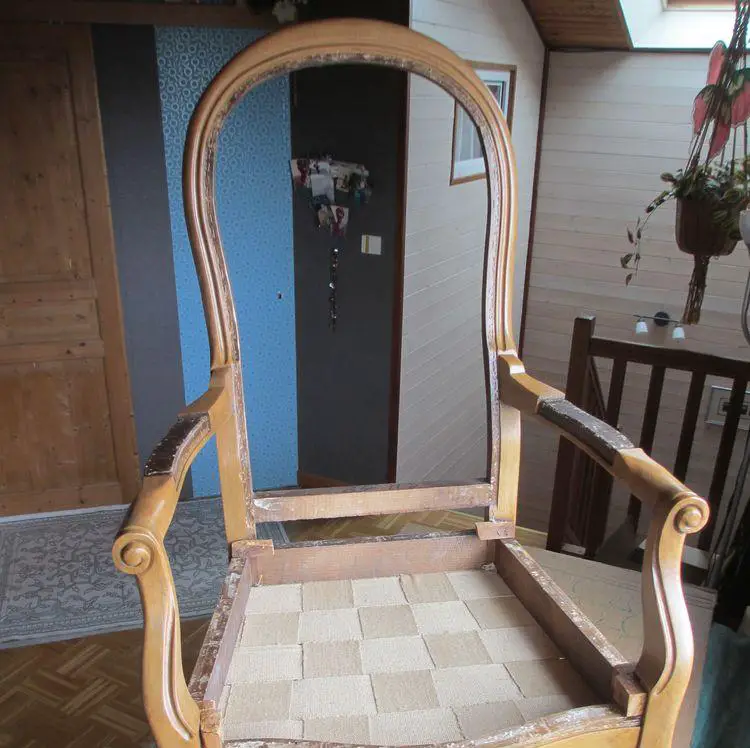
Restoration #4
Varnishing the wood. A good "waxed varnish" finish is obtained with three coats of waxed varnish and light sanding 000 between coats.
Consumables :- Steel wool 000
- Colorless satin varnish or slightly tinted

Libéron
Steel wool no.000
150 g

Bekateq LS-150
Polyurethane wood varnish
Colorless satin, 1 L
3. Strapping
This is the step where you need to know how to gauge your efforts.
It is now a matter of establishing a good solid base for laying the springs, while maintaining a certain elasticity for the comfort of the seat.
You will often find old armchairs where the straps are not flush. Current recommendations advise leaving no space between the crossed straps.
There are many models of strap puller, ranging from simple large pliers to more sophisticated tools (I recommend this strap puller ). In any case, at least three requirements must be met:
- Do not produce marks on the wood of the upright when tensioning the strap
- Keep a good compromise between excessive tension, which could cause the frame to break, and a that would lack elasticity. A good reference is producing a drum-like sound when tapping all the webbing.
- Respect a certain symmetry in the tensions of the successive different straps so as not to "twist" the seat.
It is important to properly secure the seat on a stable support before strapping it.
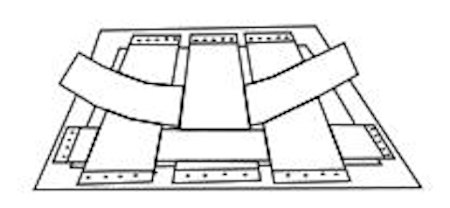
Strapping #1
Diagram showing how to strap the chair seat.
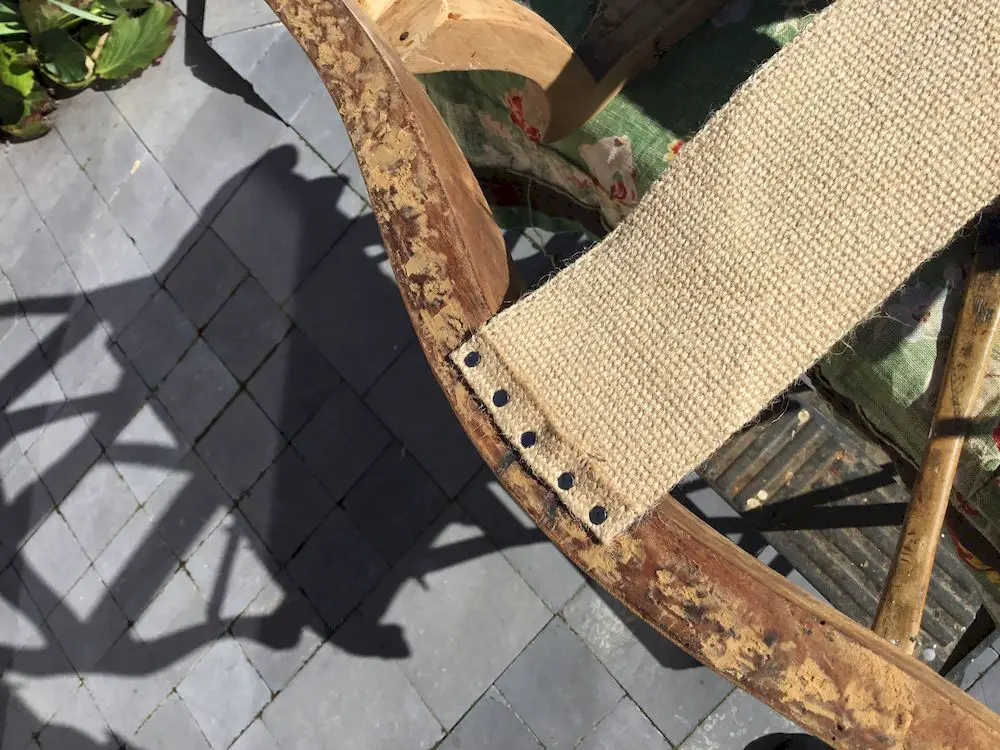
Strapping #2
Start strapping at the center, on the front, which is generally curved
Consumable :- 8.5 cm wide strap

artapisserie.fr
Jute strap 85 mm
25 meter roll
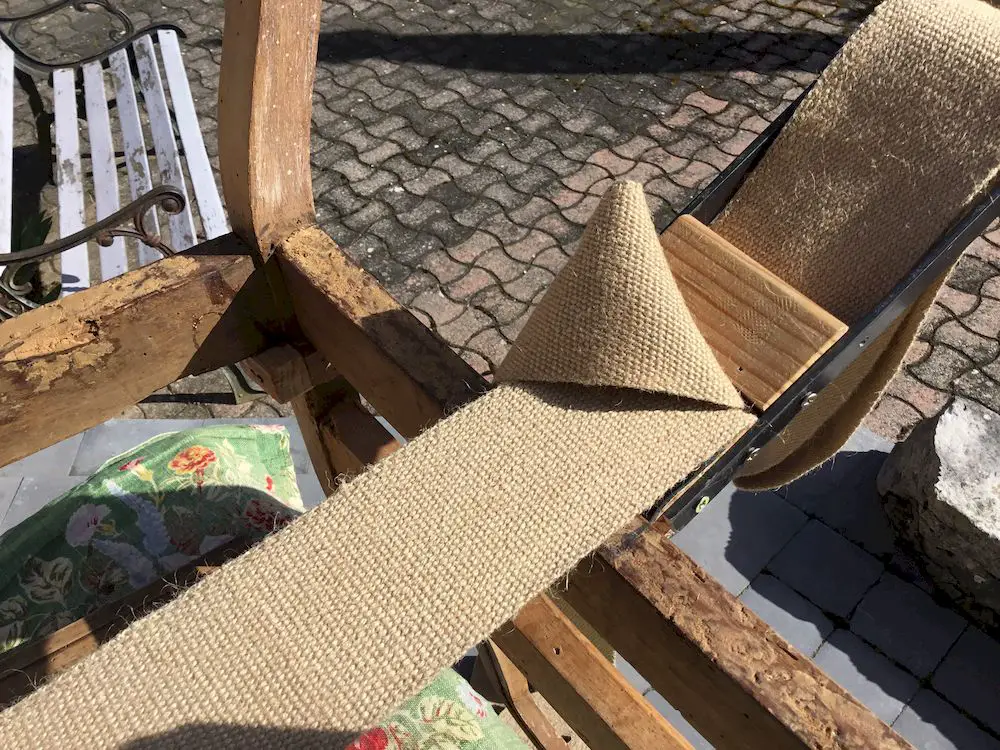
Strapping #3
Tighten the straps and fix them to the chair.
Tools and Consumables :- Strap Puller
+ more info on strap pullers - Large Seeds
+ more info on seeds
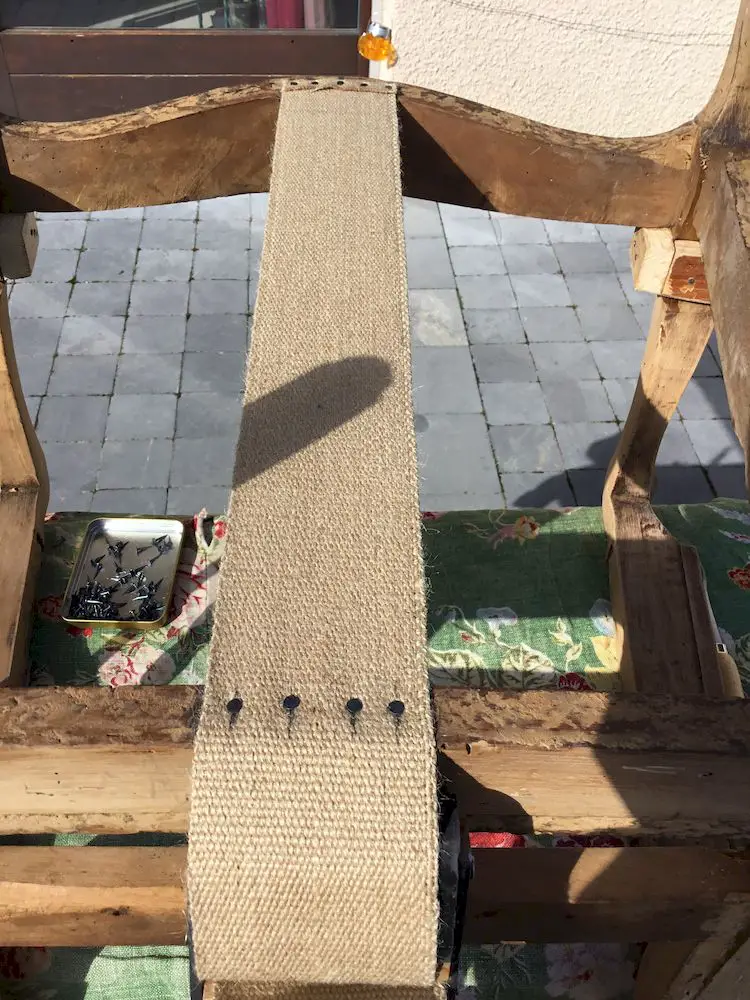
Strapping #4
To know if the correct tension has been achieved, the tightened strap must resonate like a drum.
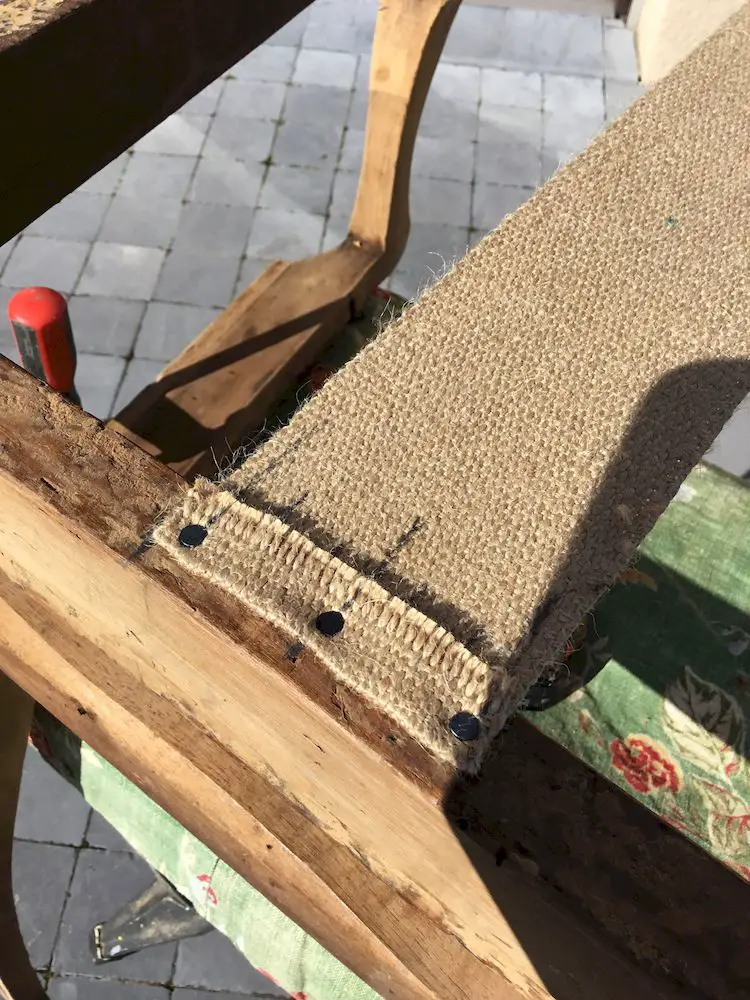
Strapping #5
Place the longitudinal straps by alternating sides relative to the center.
Then place the transverse straps by alternating starts on the right and left, to avoid sagging of the frame and following the strapping plan.
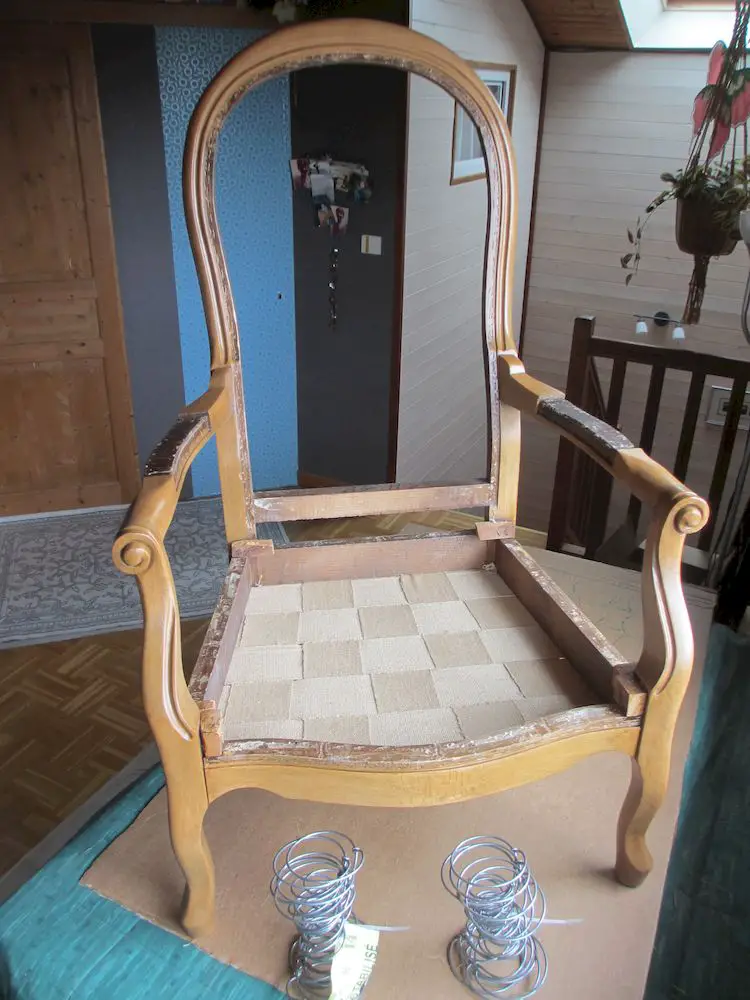
Strapping #6
Be careful not to leave any space between the straps.
4. Placing the springs
Glorious uncertainty facing all possible choices regarding the size and arrangement of the springs.
The most common formula for calculating spring height is to multiply the distance between the straps and the top of the front pegs by 1.5. but some add 1 cm.
The heights of steel springs are often standardized to 11, 14, 17 and 21 cm.
The arrangement depends on the shape of the seat; often the front is slightly wider than the back, and an extra spring is placed on the first row.
If you want to increase the slope of the seat towards the back, use shorter springs for the rear row.
Some maximize, others minimize the total number of springs…
It is recommended to allow a space of at least 3 cm between the springs and the wood of the seat and to distribute a regular spacing between the springs.
The upholstery knots of the springs are always placed at 45° relative to the axes of the seat, in order to avoid the premature wear caused by the passage of the binding cord over them.
So it is a bit difficult to make up your mind, but once done, do not forget to mark the locations on the straps.
The stitching of the base of the springs on the strap is done using a simple loop of string to be sewn.
Each spring is fixed at four points :
- After the starting point, start by sewing the strap from underneath
- For the first three points, the needle comes out of the strap outside the spring to re-sew inside
- For the fourth point, the needle comes out inside the spring to re-sew outside. This avoids crossings of string, which are factors of wear.
Springs #1
Calculation of the adapted spring height.
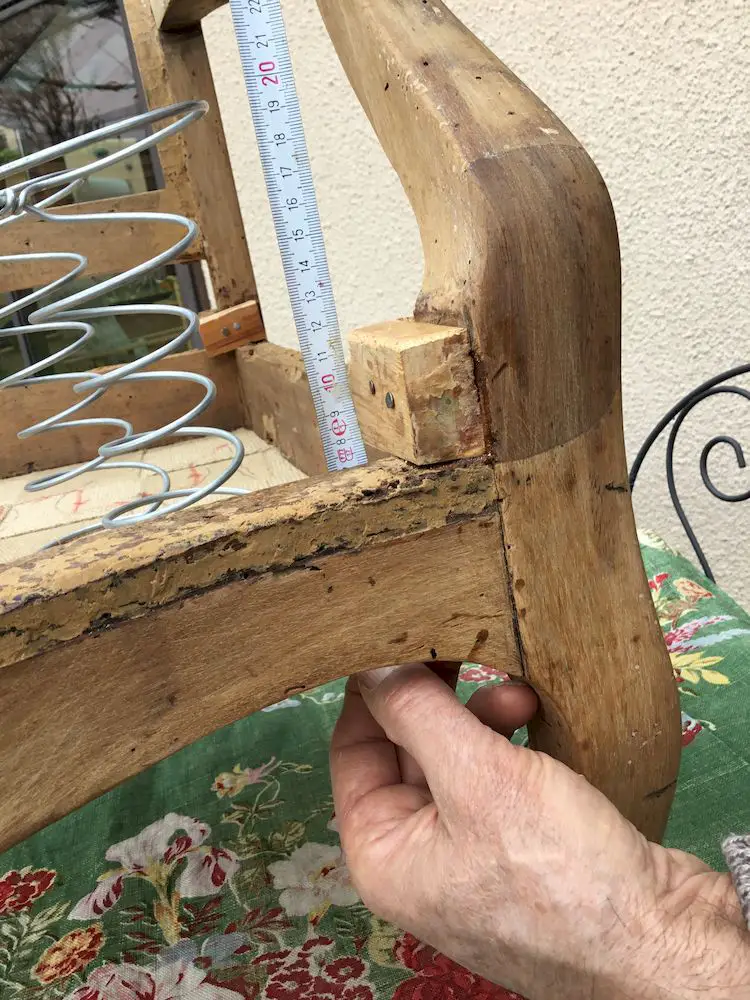
First, measure the height from the seat (at the level of the straps) to the top of the chair's peg to then perform the calculation giving the height of the springs to use.
Formula :
H.spring = 1.5 x H.peg (round the result)
Here, in the photo: H.peg = 11.3 cm ⇒ The adapted springs are 17 cm high springs (11.3 x 1.5 = 16.95 ≃ 17).
Here are the most common spring sizes:- 17 cm (Large)
- 14 cm (Medium)
- 11 cm (Small)
- Steel upholstery springs

Tendaggimania
Biconical springs 5 coils
Galvanized steel, pack of 4
Height of 18 cm
Springs #2
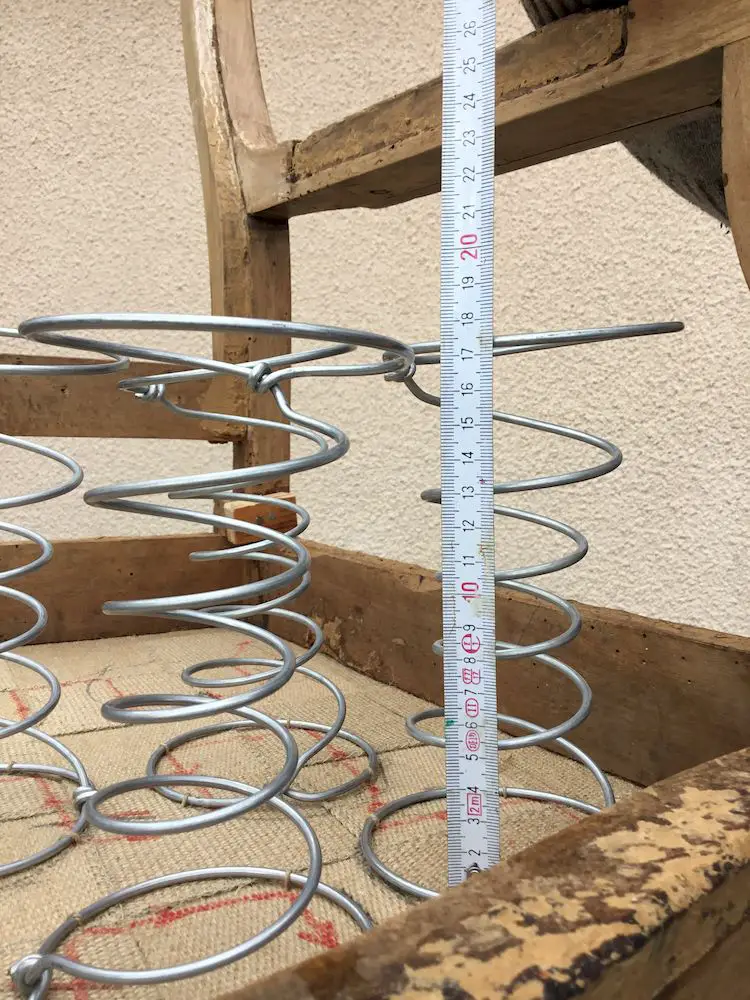
Here, therefore, spring height = 17 cm.
However, smaller springs are sometimes installed on the last row, close to the backrest.
In the example shown, to improve the seating comfort, you can choose a spring height of 14 cm for the rear row of springs.
Springs #3
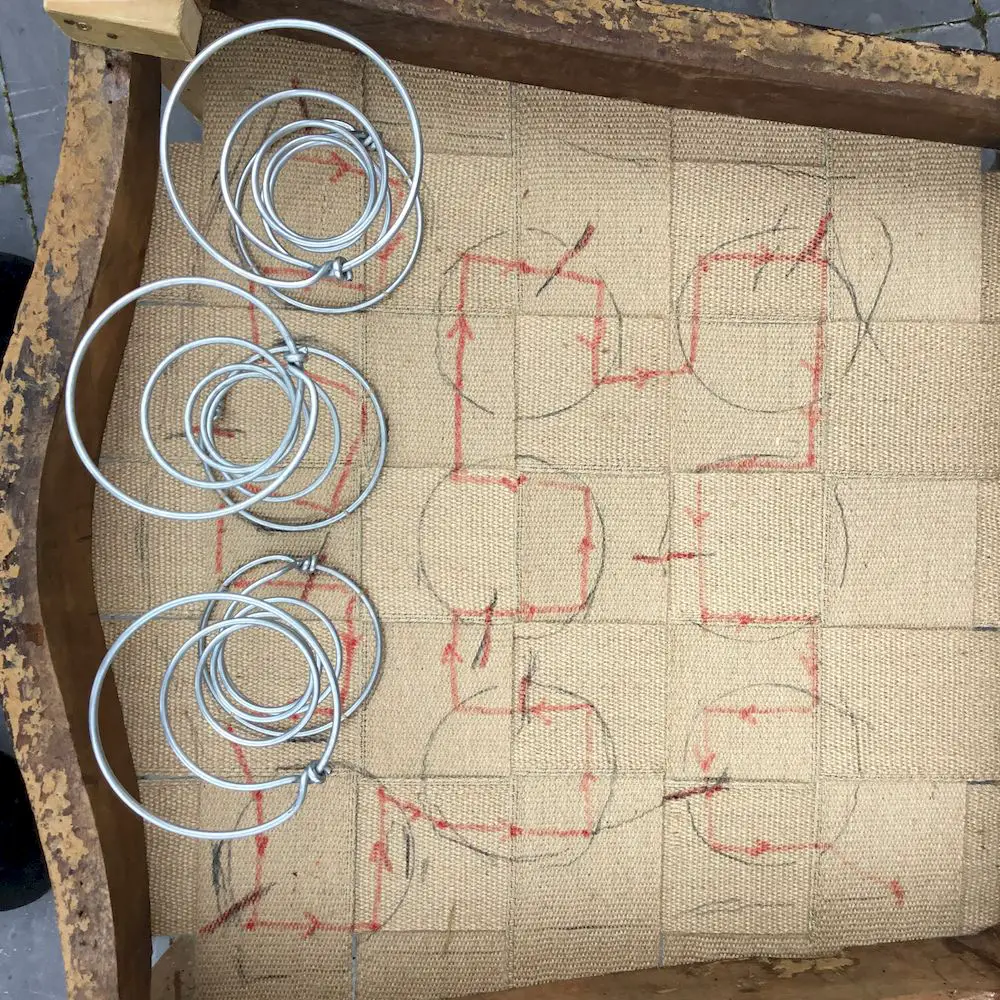
Place the springs so they do not touch each other (2 to 3 cm apart).
Mark their positions and the thread layout, avoiding crossings (layout in red).
Tool and Consumable :- Curved needle or Carrelet
- Spool of linen thread

Curved needles
Pack of 4
From 5.1 to 10.2 cm

Ecru linen twine
Diameter of 1 mm
Length of 80 m
Springs #4
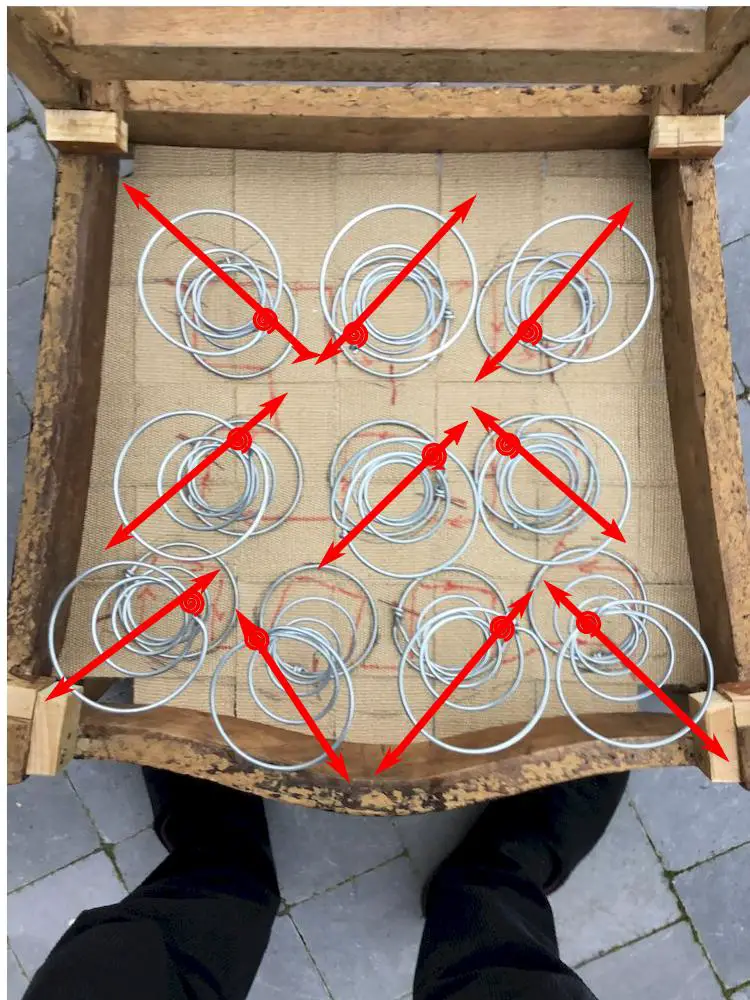
Sew the base of the springs onto the straps with a simple loop, avoiding overlapping threads.
The upper knots of the springs are arranged along the diagonals of the armchair seat.
5. Spring lashing
It is at this stage that one tests finger strength and wrist robustness and generates calluses on the sides of the hand. This explains why one remembers the handshake of certain upholsterers for a long time.
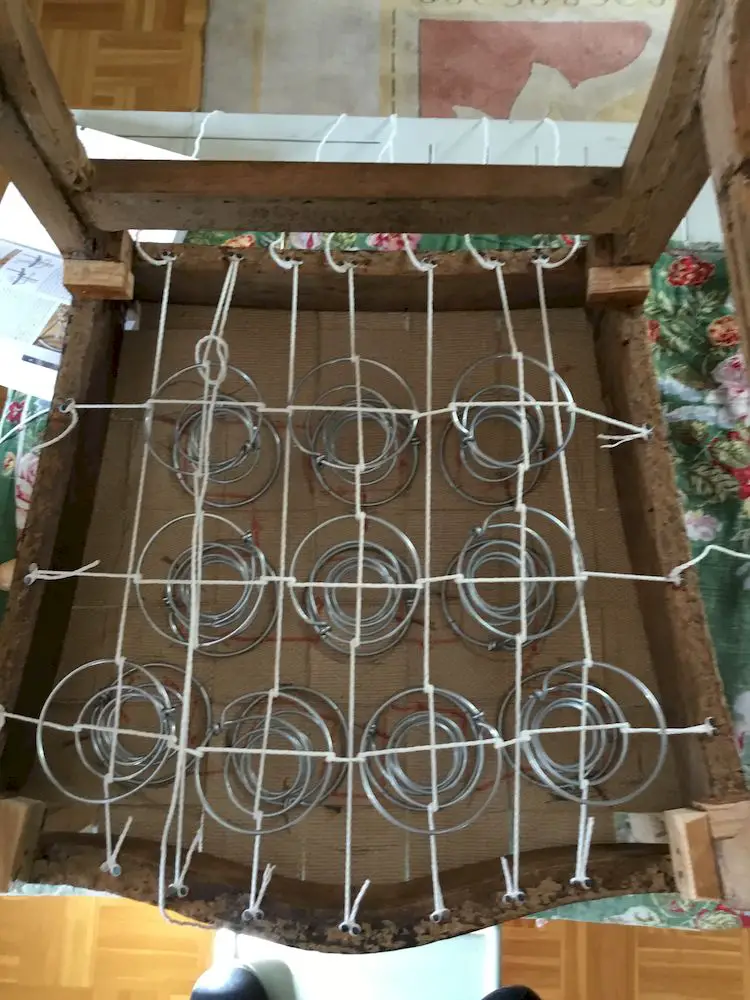
Two schools face off: those who start with the transverse strands and those who start with the longitudinal strands; among the latter, some start pulling from front to back and others from back to front... It is up to you to form your own opinion... Ultimately, the springs must be at the correct height and well aligned.
The first lashing cords are passed over the pavilions without being tied. Once the cord is tensioned, it is secured with one of the two upholstery tacks already driven halfway into the rails. After proper adjustment, the tack is hammered in to allow you to calmly finish the bowline knot on the second tack before final nailing.
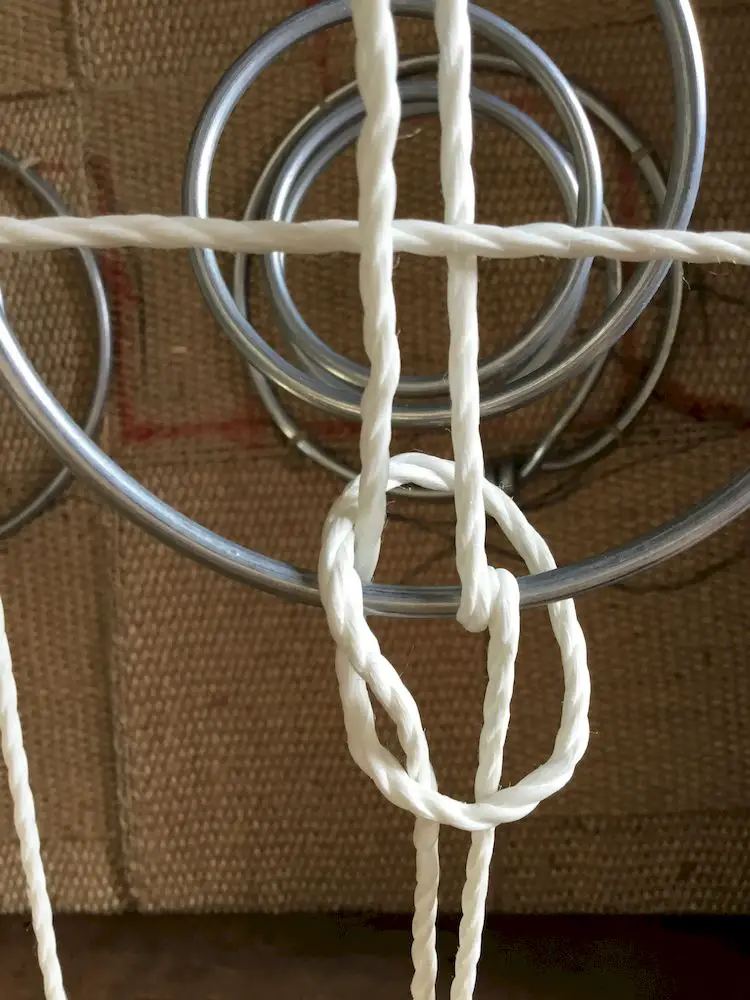
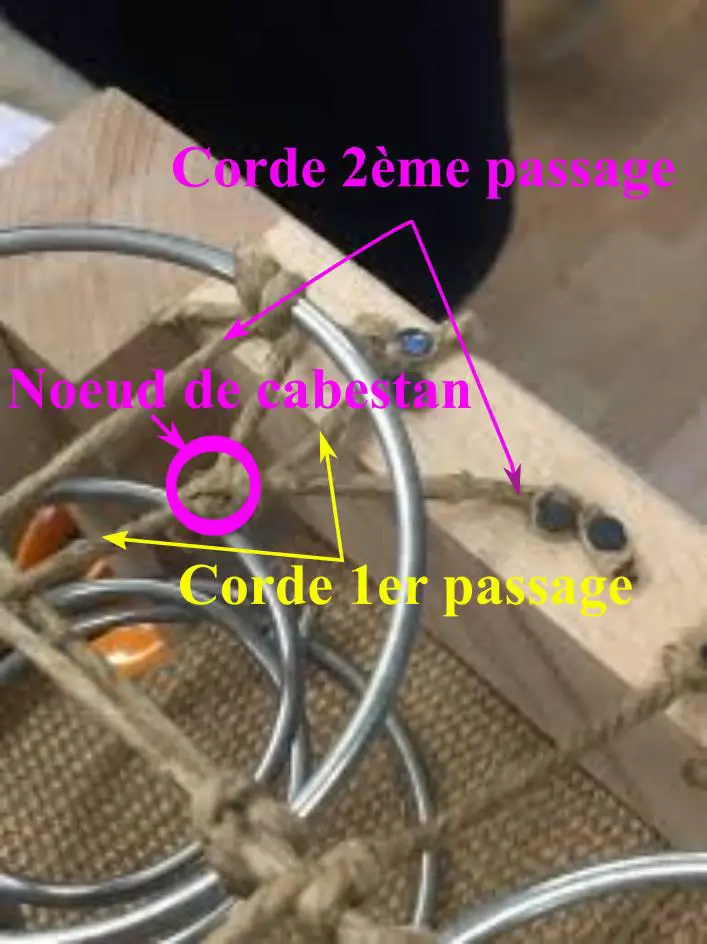
During the second passes, the cord is tied using the recall knot. When executing this knot, it is good to remember that the two strands upstream of the knot are always inside the two strands forming the loop.
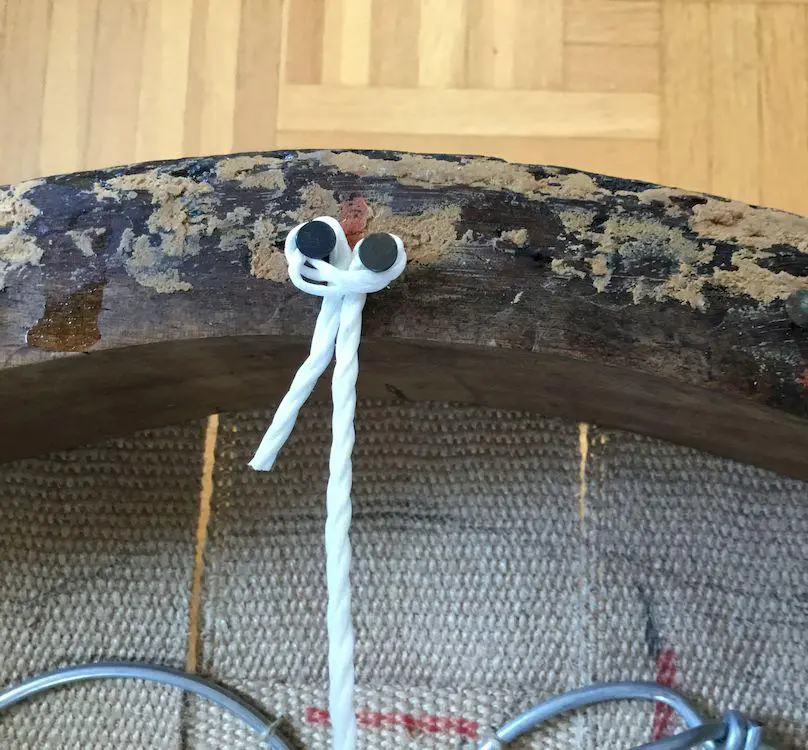
Spring lashing #1
The twine is fixed at the start, on the frame, using swallow knots between two large stakes.
Consumables:
- Guindage Twine
- Large Stakes
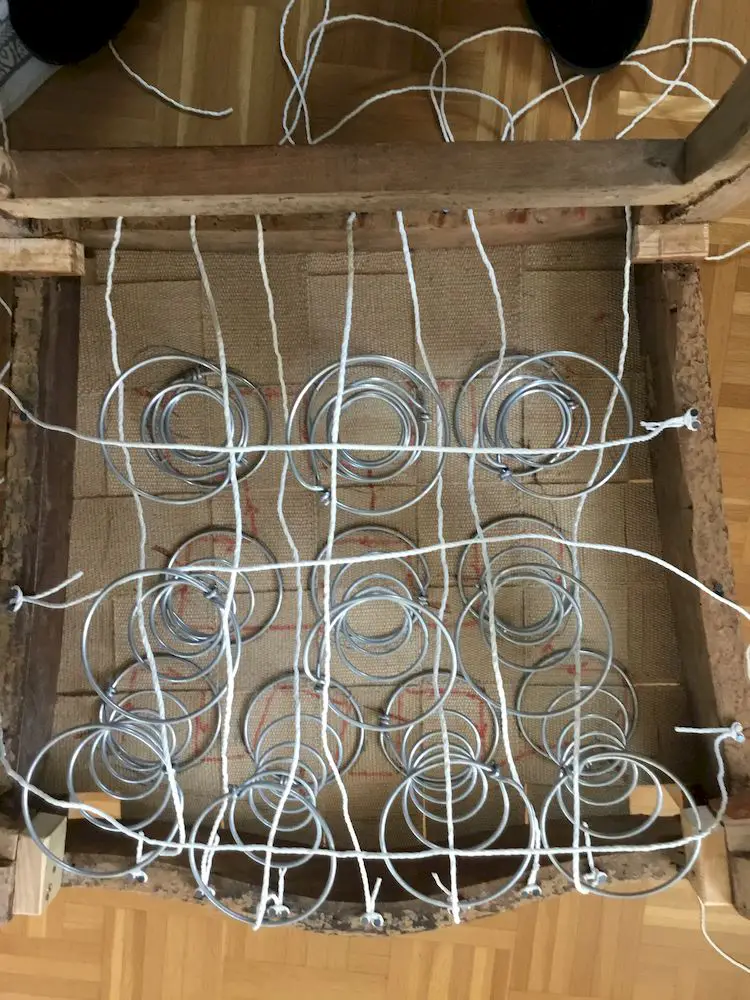
Spring lashing #2
Fix a strand to one end of each of the transverse and longitudinal axes. Plant a pair of stakes at the other end.
Plan for lengths of twine strands equal to three times the width and three times the depth of the armchair.
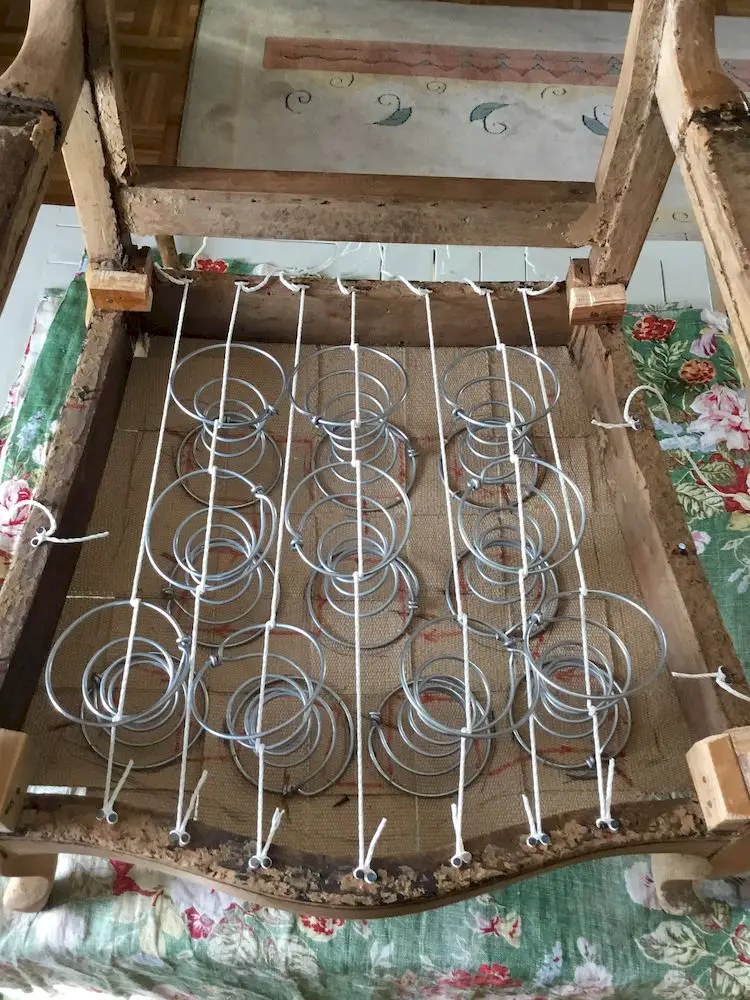
Spring lashing #3
Make a loop on each side of the upper coil of the springs that are in the axis of the strand, except on the front of the first springs where it is wrapped around the second coil.
Make a dead turn of the strand on the arrival stake. Nail this stake when the springs are compressed to the height of the pegs.
Then wrap the strand around the second stake to make a swallow knot.
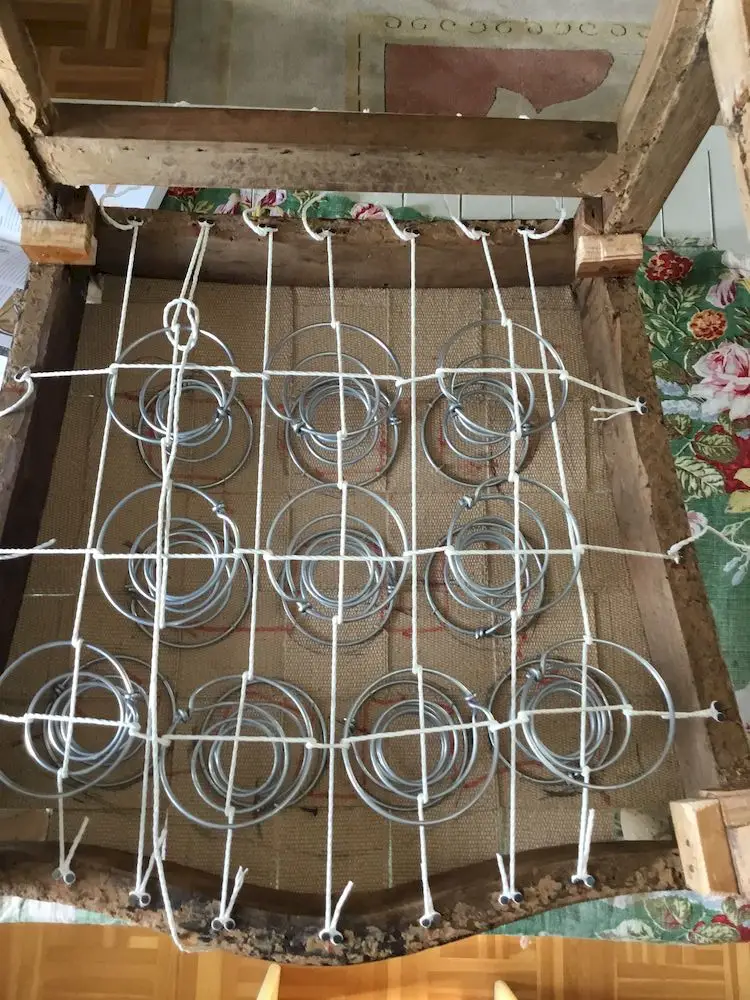
Spring lashing #4
Do the same thing on the transverse axes.
Tip: Vet's mittens can protect delicate hands during the numerous cord pulls for spring lashing.
Spring lashing #5
2th longitudinal pass
Spring lashing #6
Make this rappel knot on all crossings between the strand and the springs.
Spring lashing #7
This is a capstan knot around the loop of the first pass.
Spring lashing #8
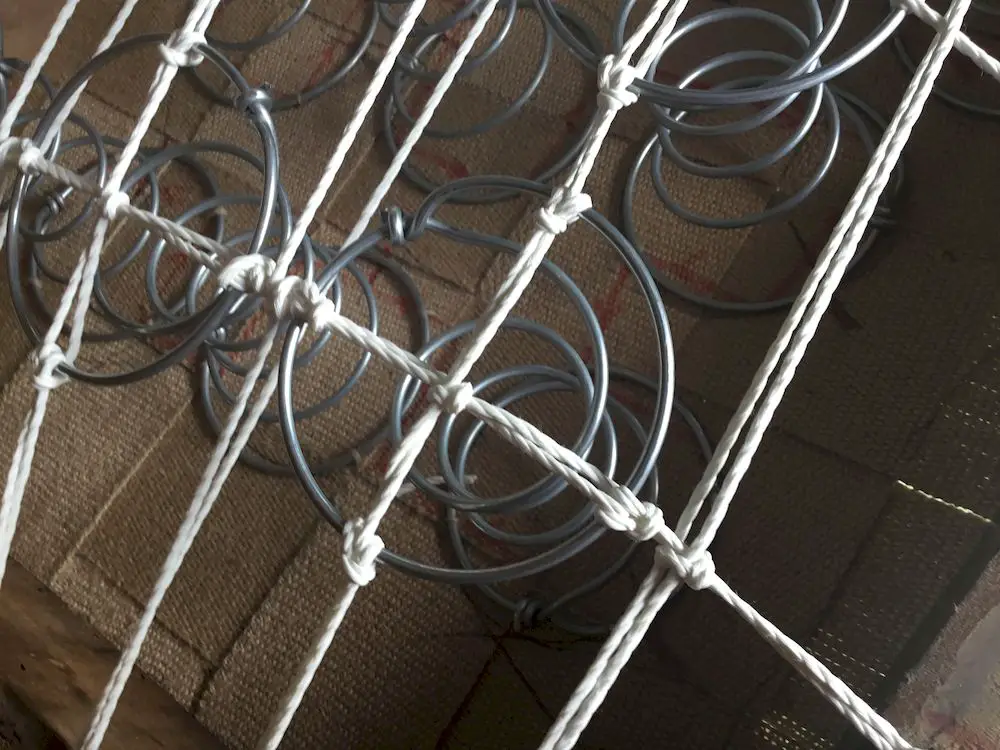
The rappel knot is made on all crossings:
- strand-spring
- strand-strand
At the end of spring lashing, the springs must not be more than 2 cm above the pegs.