Reupholstering an armchair traditionally
Tutorial: steps 6 to 10
The 15 steps of reupholstering an armchair
6. Installing the hessian
This is a pleasant step where you rest from the intense effort of spring lashing, but you must not lose track of the hessian alignment.
The dimensions of the hessian are those of the webbing increased by 5 cm.
It is important to mark the axes to ensure the correct squareness of the hessian on the seat.
It is fixed by making a fold on top at the angle of the bevel of the webbing.
Upholstery tacks are placed every 2 cm, starting from the middle of each side opposite each other and alternately. This allows the hessian to be well tensioned without shifting the squareness.
Do not place upholstery tacks in the blocks.
Unlike the fixing of springs on the webbing, you must make a knot and not a simple loop with the twine to fix them to the hessian.
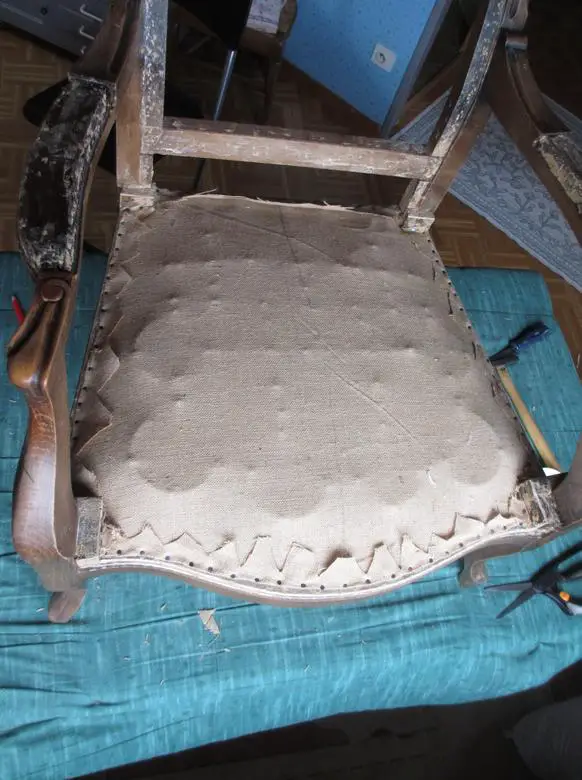
Hessian Installation #1
Allow a margin of 5 cm relative to the dimensions of the armchair. Provide notches for the rounded corners.
Do not nail the hessian on top of the blocks.
Consumables:
- Hessian
- Medium Upholstery Tacks

Heavy Jute Fabric
380 g/m², 190 cm wide, 100% jute
Woven in France, untreated
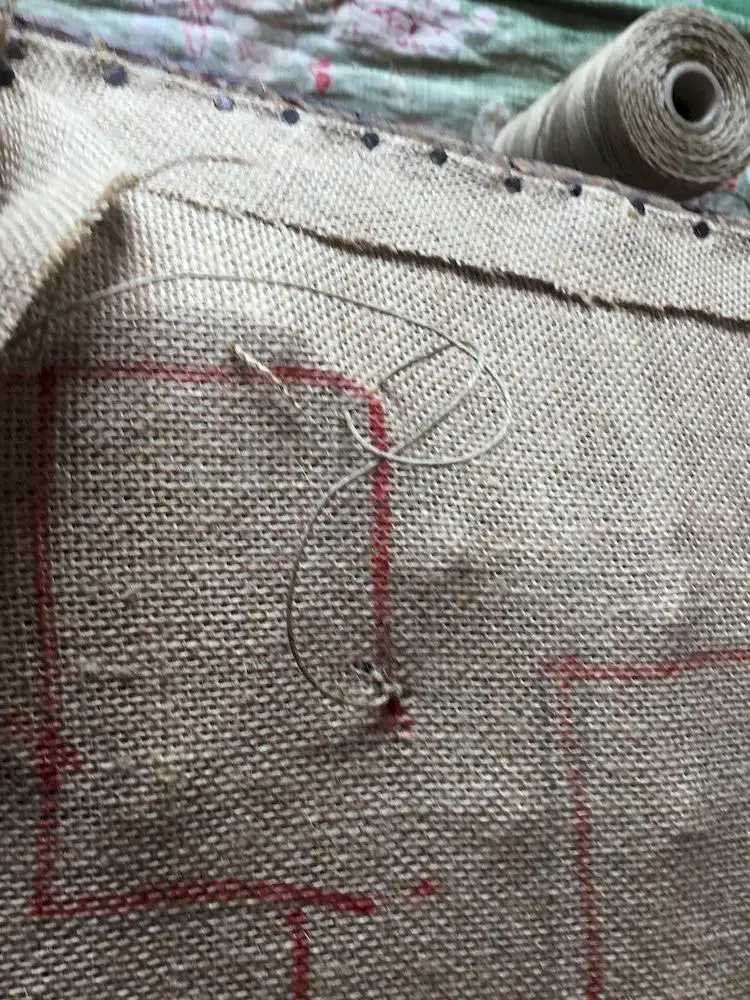
Hessian Installation #2
Sew the hessian at four points on each spring, using knots.
Tool and Consumable:
- Curved Needle
- Picking Twine

Curved Needles
Set of 8 needles, 4 sizes from 2 to 3.5 inches
Large eye for easy threading
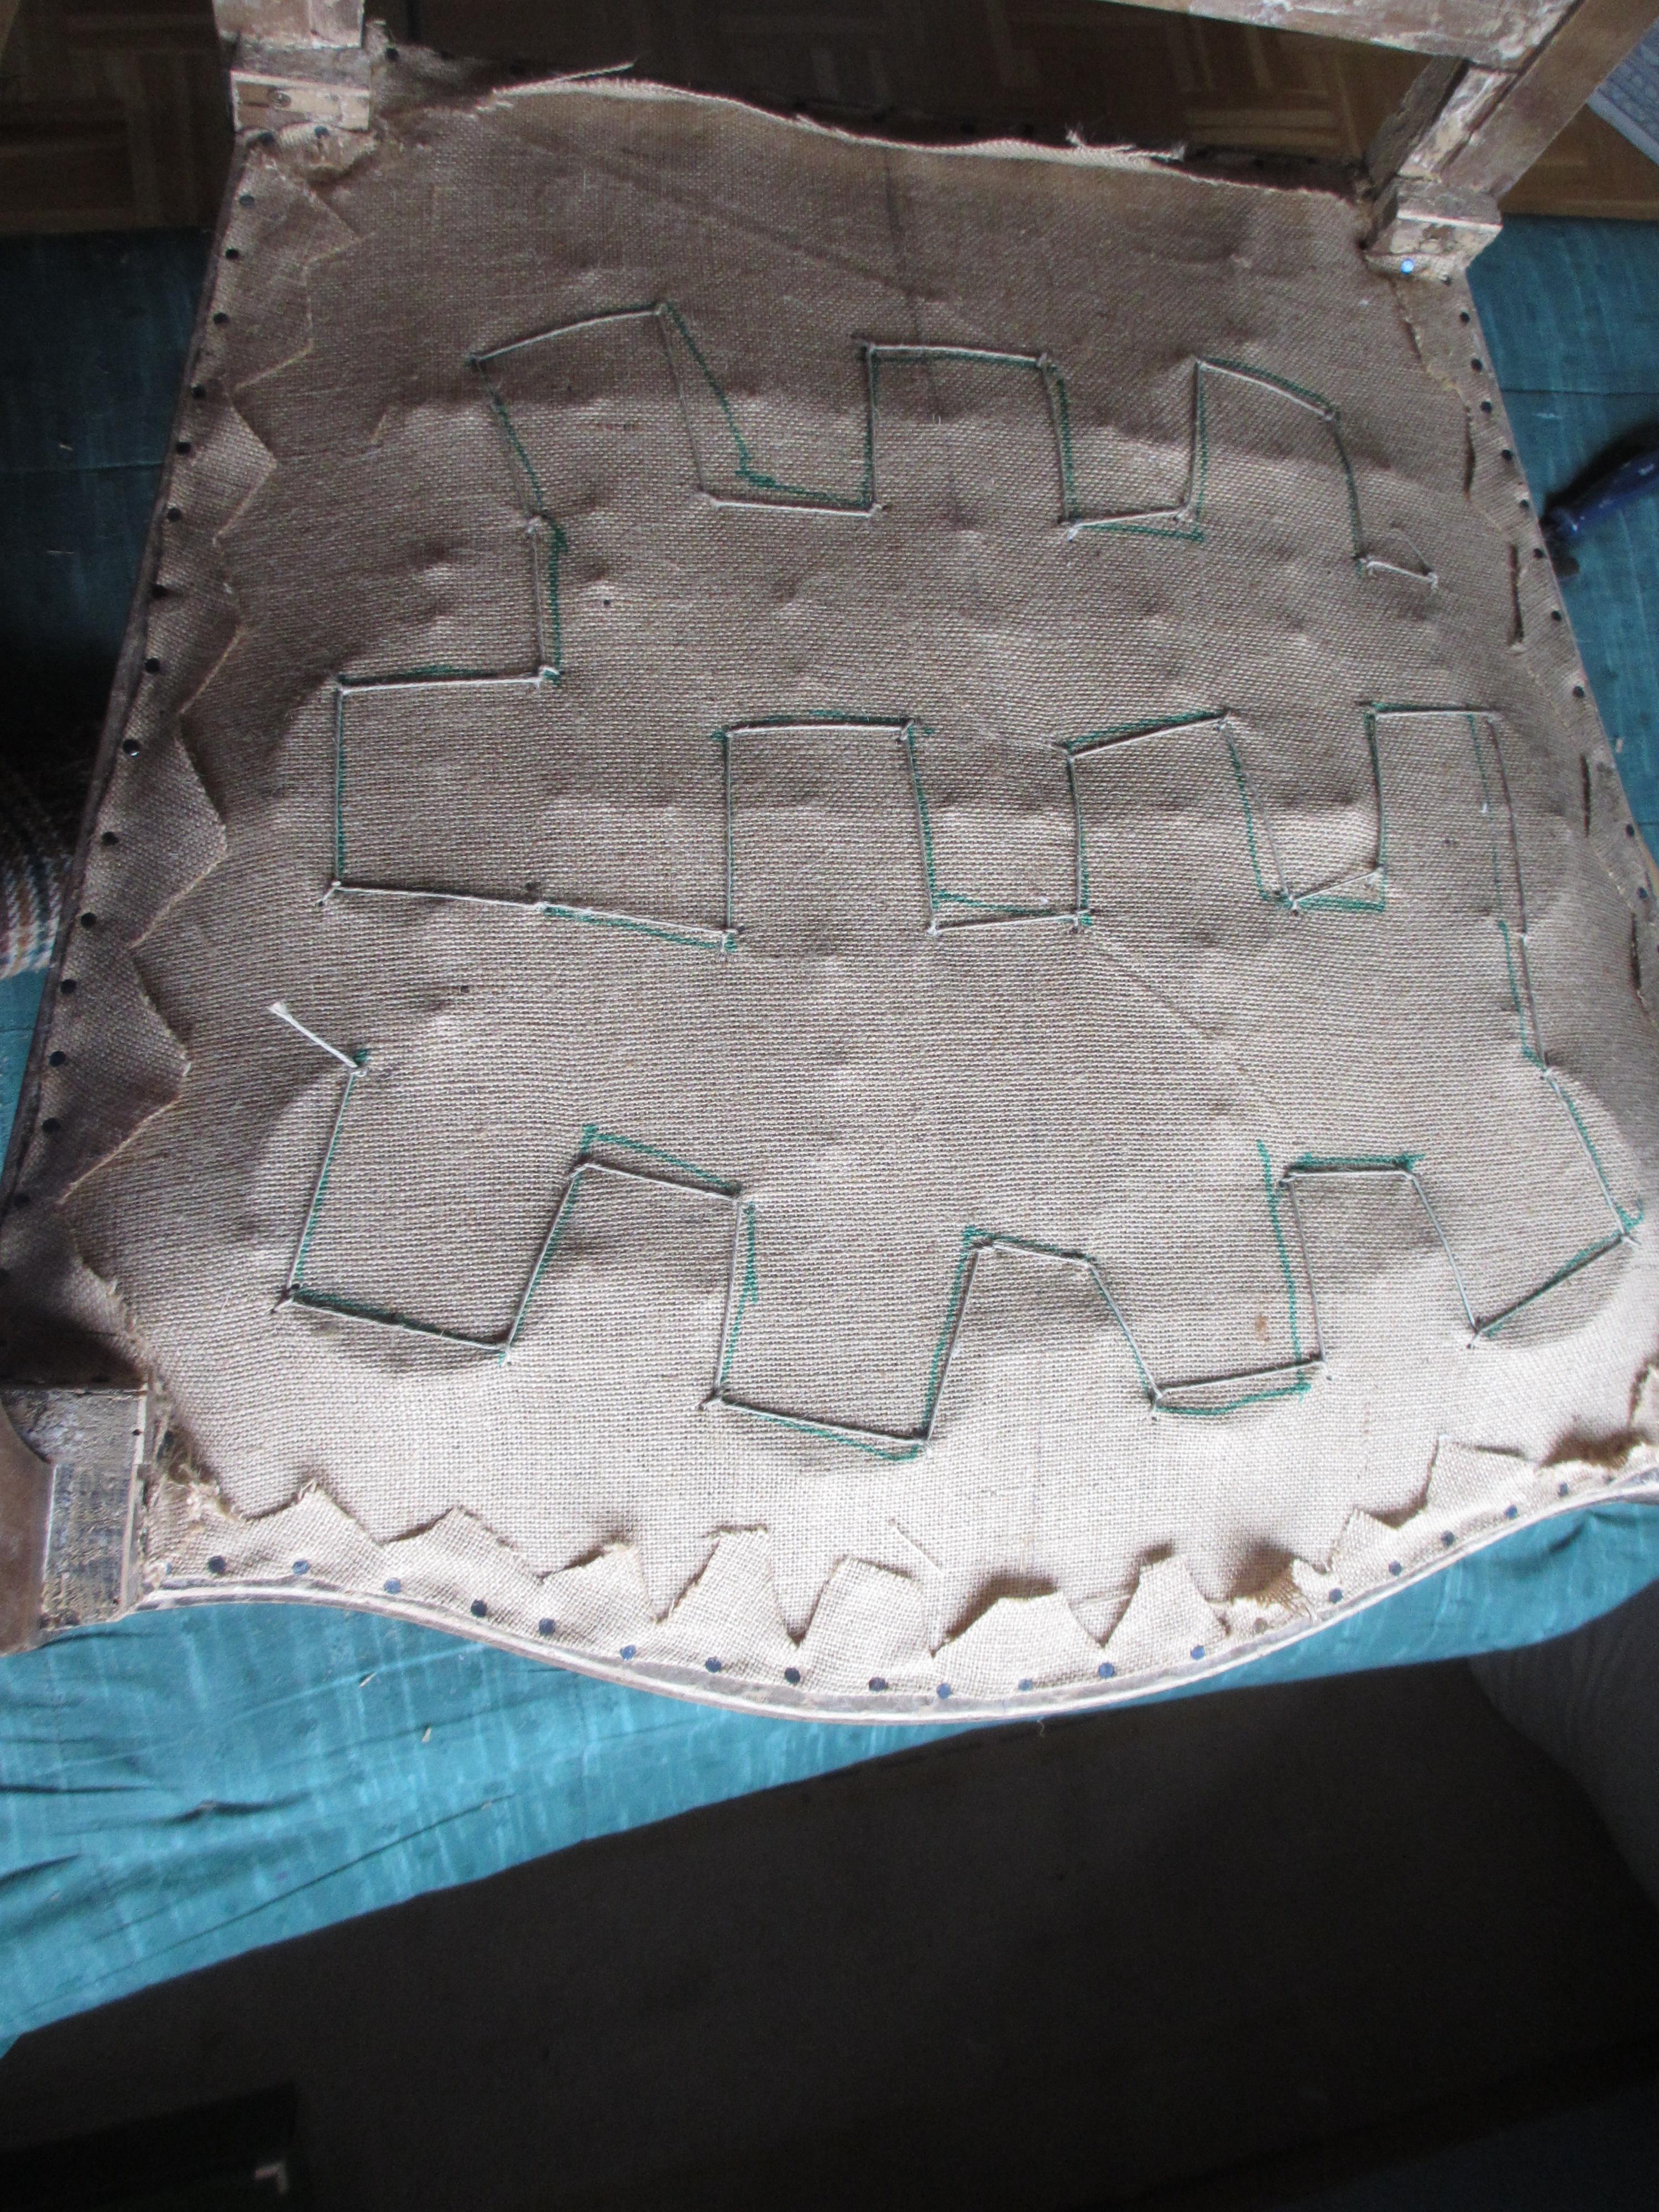
Hessian Installation #3
Follow a path so as to minimize it and avoid crossings.
7. Adding vegetable horsehair
This is a step of heavy tactile work, where the sensitivity of the fingers is called upon... as well as the nose by the tenacious smell of horsehair.
The objective is to wrap handfuls of horsehair around loops of twine approximately 13 cm long and two fingers high, sewn onto the hessian using backstitches (laces).
The rows of laces are arranged transversely, spaced about ten cm apart on the depth, with a margin of 2 cm from the edges.
Note: for a backrest, the laces are arranged vertically.
It is at this point that the height of the horsehair roll and its backward slope angle are determined by adjusting the thickness of the horsehair handfuls, which is greater on the first third of the seat front.
As springs tend to make the roll bulge, this can be taken into account by reducing the horsehair thickness on the central parts.
When in doubt, it is better to have too much horsehair than too little, as it is easier to remove than to add.
Manual carding of the entire laid horsehair is important for the homogeneity and suppleness of the padding. It is difficult to know when to stop.
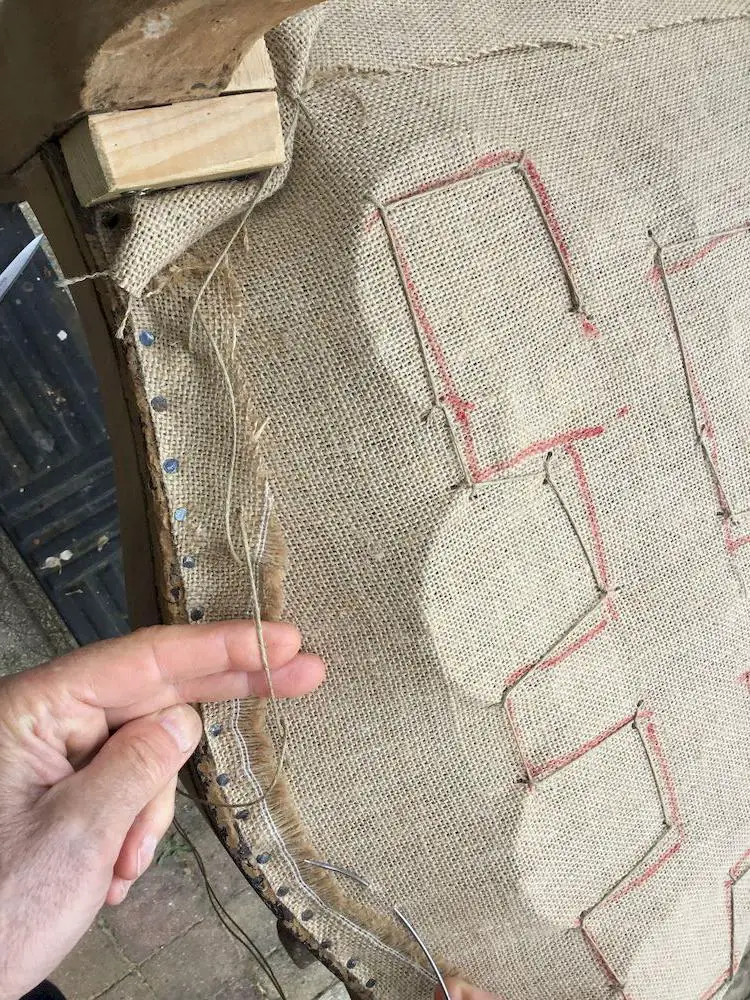
Vegetable Horsehair Installation #1
Place the first row of laces.
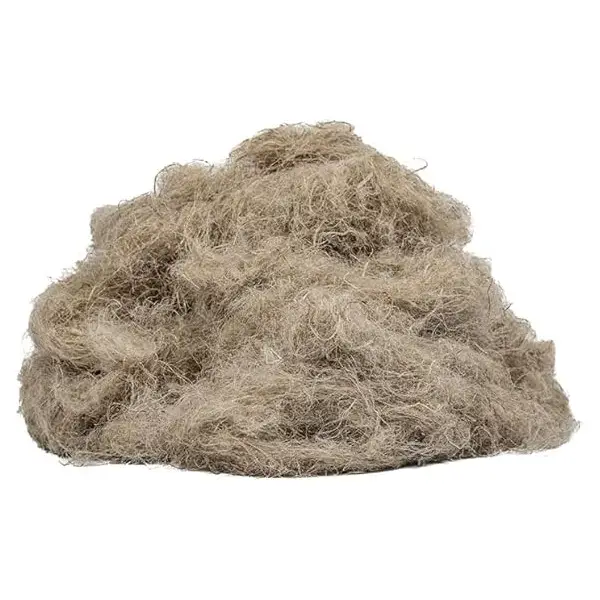
Carded Vegetable Horsehair
Sold by the kg - 100% hemp
- For seat padding
- Hypoallergenic, breathable and naturally resistant to mold and parasites
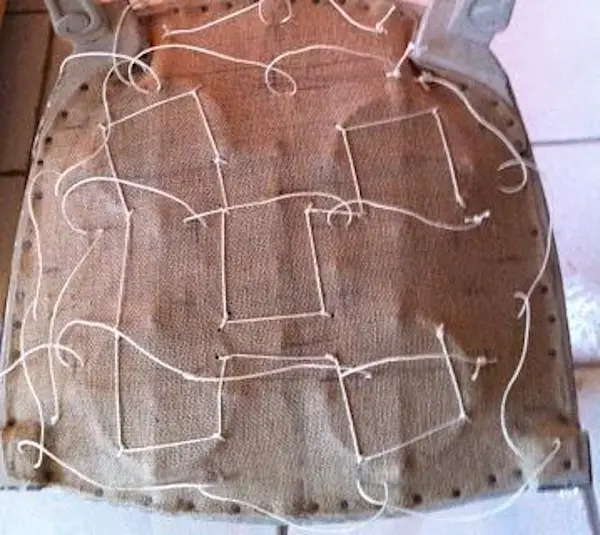
Vegetable Horsehair Installation #2
Arrange transverse laces on the seat, leaving two fingers of height between the twine and the seat for each loop.
Space each row of laces 8 to 10 cm apart, leaving 2 to 3 cm free on the sides.
Tool and Consumable:
- Curved Needle
- Picking Twine
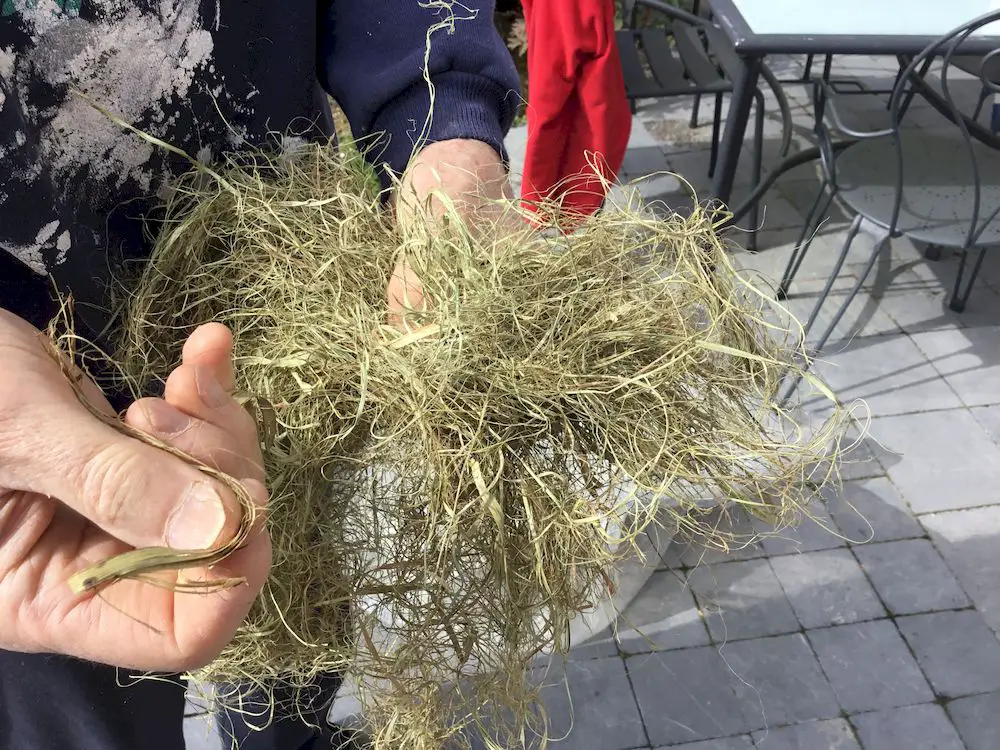
Vegetable Horsehair Installation #3
Perform manual carding to extract twigs or horsehair knots.
Consumable:
- Vegetable fiber
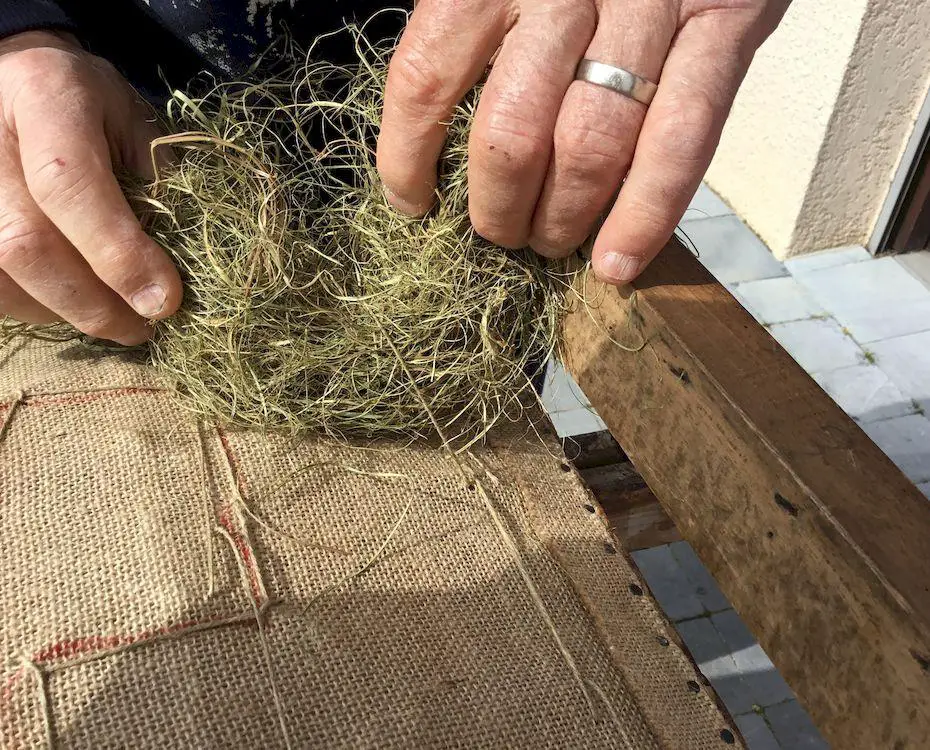
Vegetable Horsehair Installation #4
Slide a handful of horsehair under the lacing.
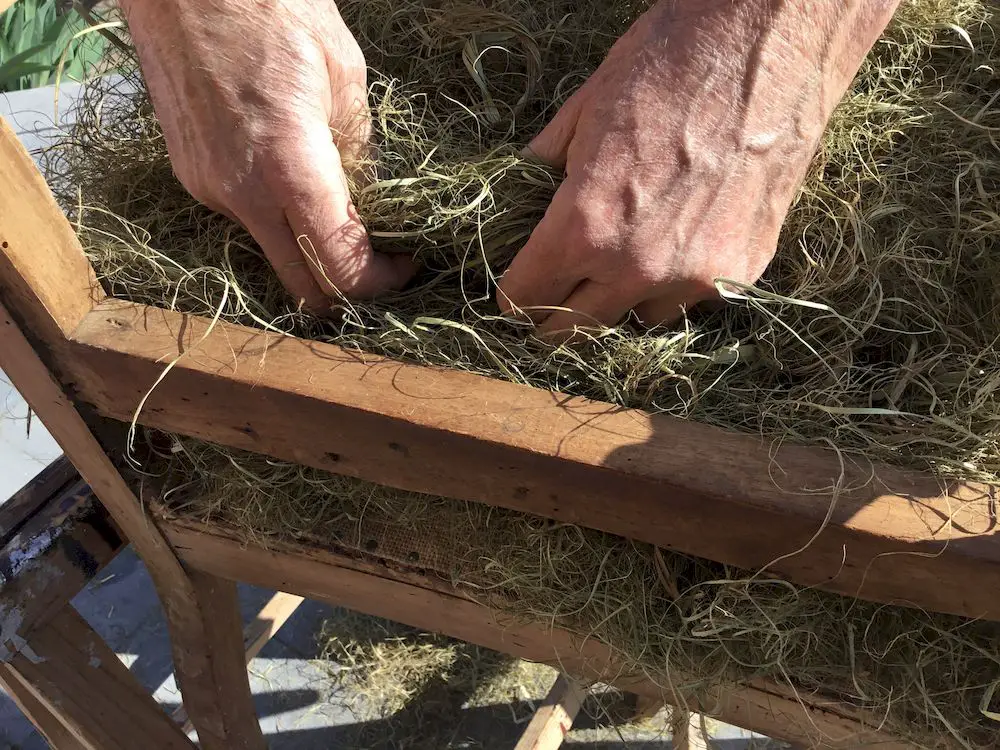
Vegetable Horsehair Installation #5
Manually adjust the entire surface, trusting your fingers more than your eyes: do not hesitate to close them during this operation.
8. Wrapping and Marking
A strategic step for shaping the seat... At the end, you should be able to say "What a beautiful ball!".
During this step, the vegetable horsehair is enclosed in a wrapping cloth before making the holding stitches.
The wrapping cloth, tucked under the horsehair, is temporarily fixed using temporary upholstery tacks sewn flush with the belt. Check the tension of the cloth from back to front so that it holds the horsehair without wrinkles.
Add or remove horsehair; you can also use the horsehair puller to move it. Simply slide the puller a few cm into the stuffing and make it describe an arc around the insertion point to move some horsehair to the desired location.
Focus on the regularity of the center of the stuffing, which will become inaccessible once the foundation stitches are placed.
Create folds in the corners by blocking them with a vertical temporary upholstery tack. The circular palette of the horsehair puller is well suited for tucking the cloth inside the fold in the corners.
It is recommended to sit on the stuffing and perform some hip movements to pack it to the right measure.
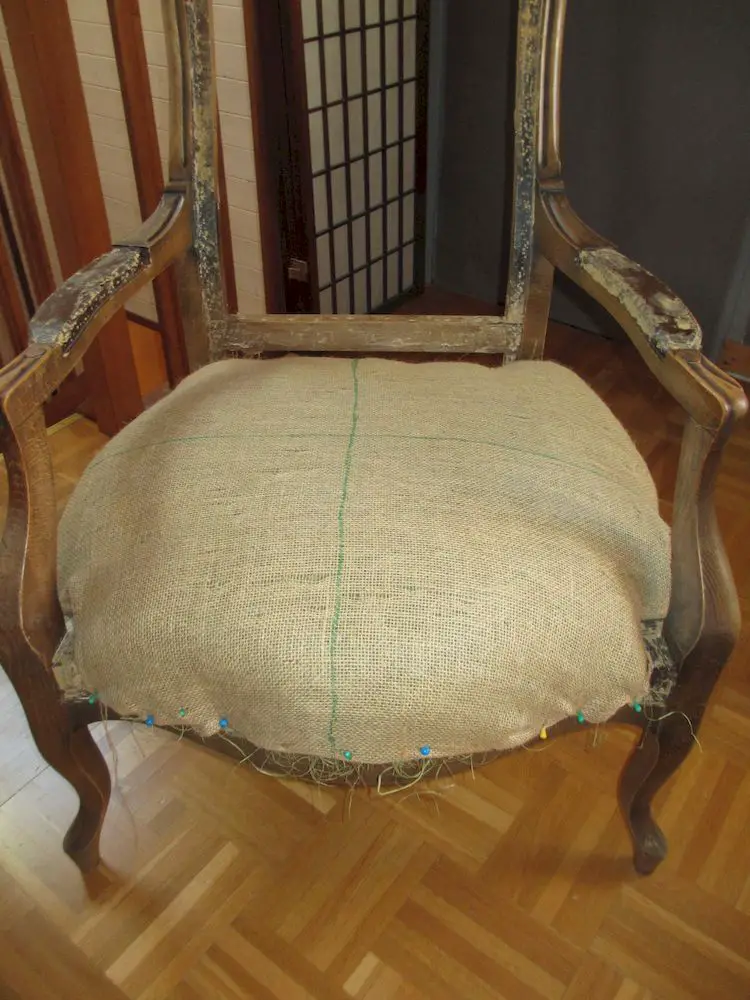
Wrapping & Marking #1
Wrap the ball of horsehair in a wrapping cloth, securing it with temporary upholstery tacks. You can replace the temporary upholstery tacks with upholstery tacks 12x6.
Draw the axis of symmetry on the cloth to align it with the axis of the armchair; you can also pull a thread from the cloth to mark the axis.
- Temporary upholstery tacks
- Wrapping cloth
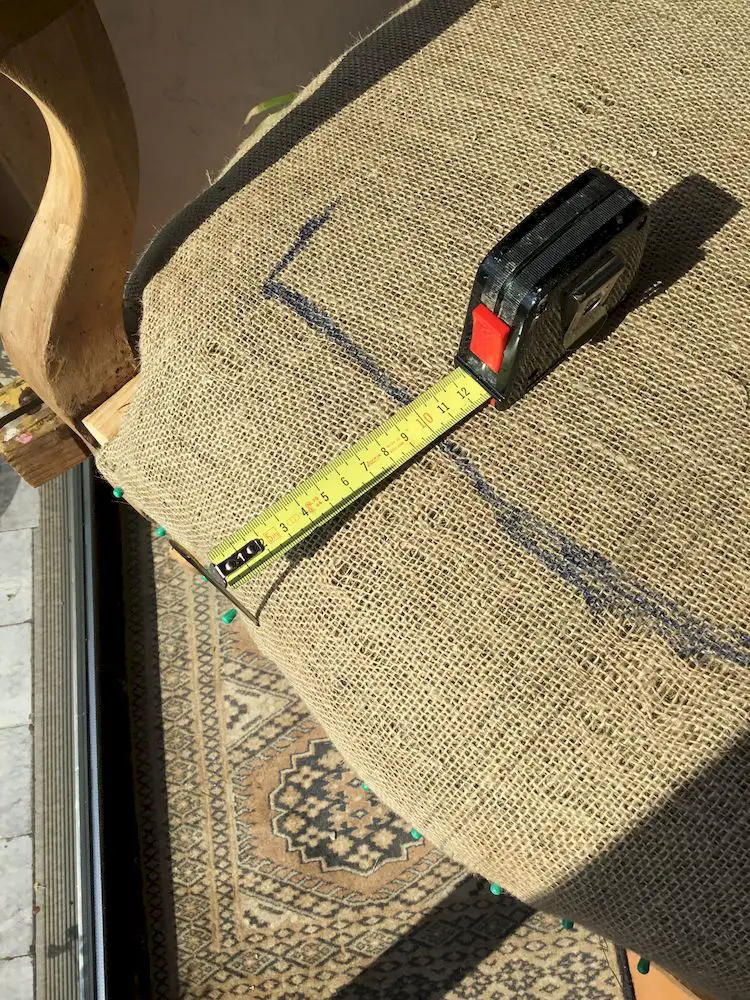
Wrapping & Marking #2
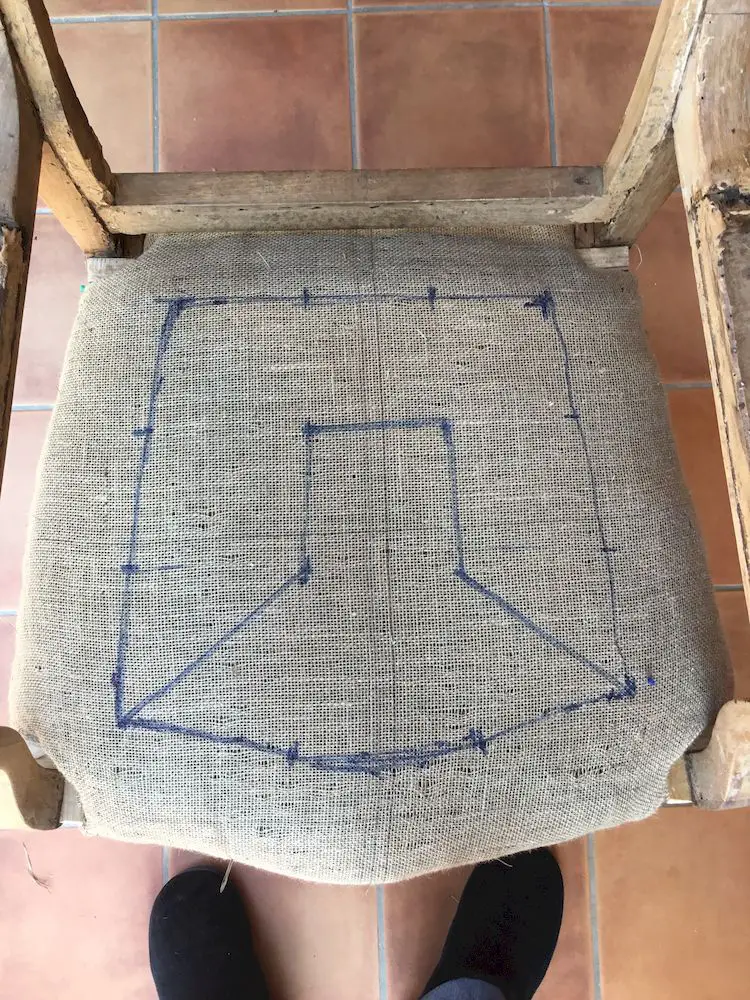
Draw a line 10 cm from the edges of the seat, using a needle planted vertically flush with the wood of the armchair as a reference.
Wrapping & Marking #3
Draw this polygon by dividing each side into three.
Mark the stitching points.
9. Foundation stitch and folding back
This is a dangerous step because handling the double-pointed needle is formidable...
The goal is to enclose the vegetable horsehair between the hessian and the wrapping cloth.
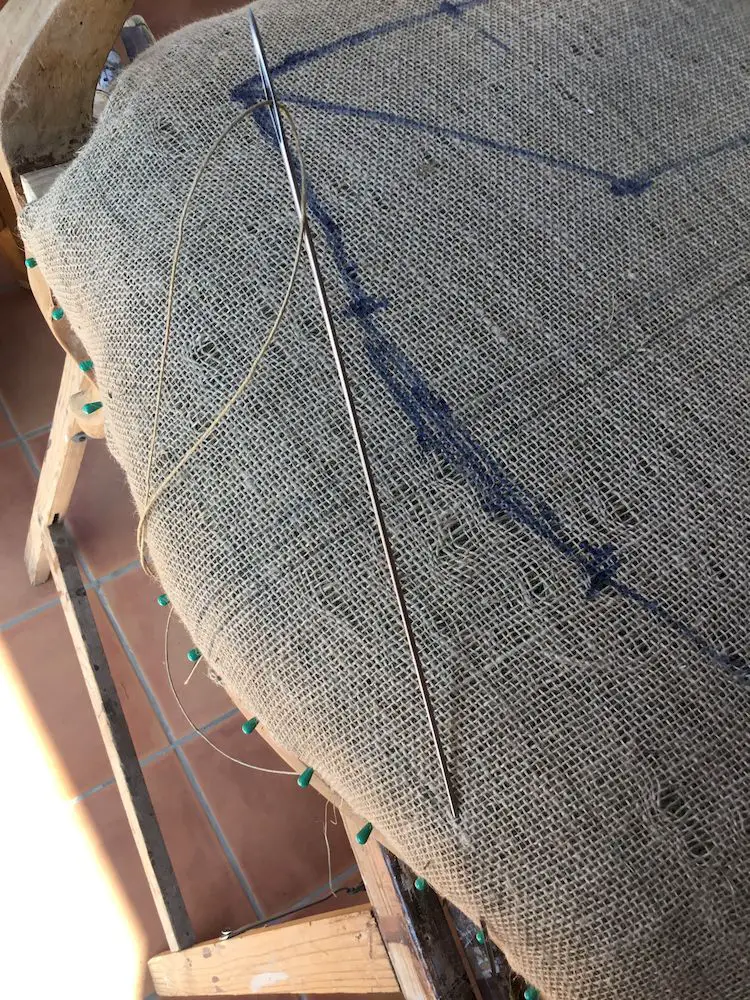
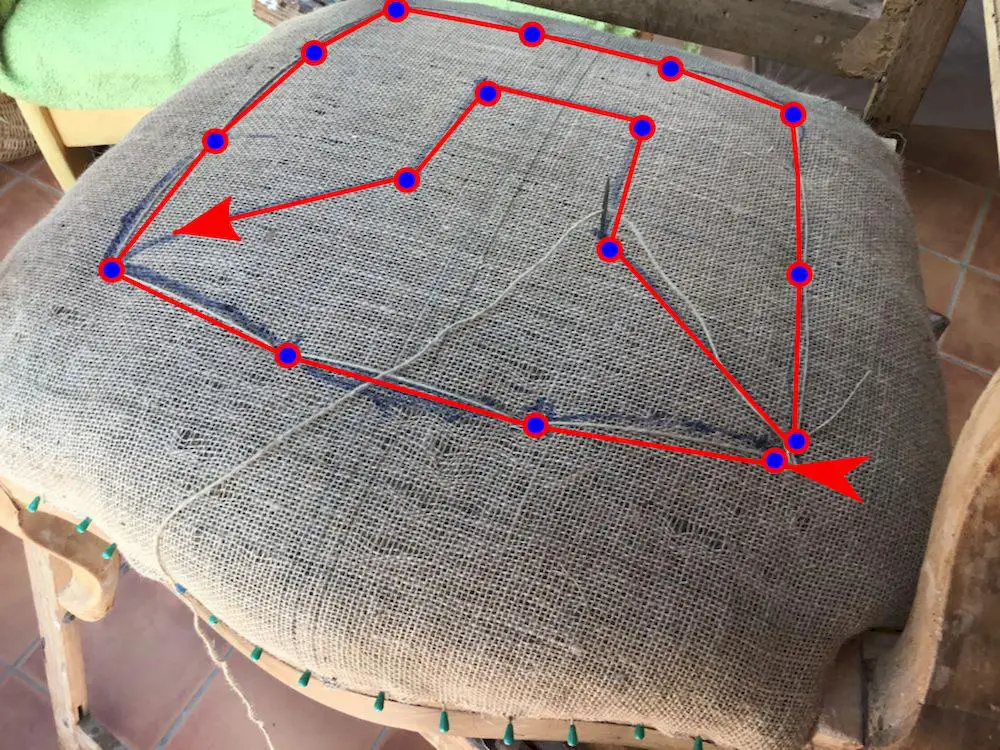
First, draw the foundation stitches at 10 cm from the plumb line of the edge and distribute them around the perimeter and the center of the ball (see photo).
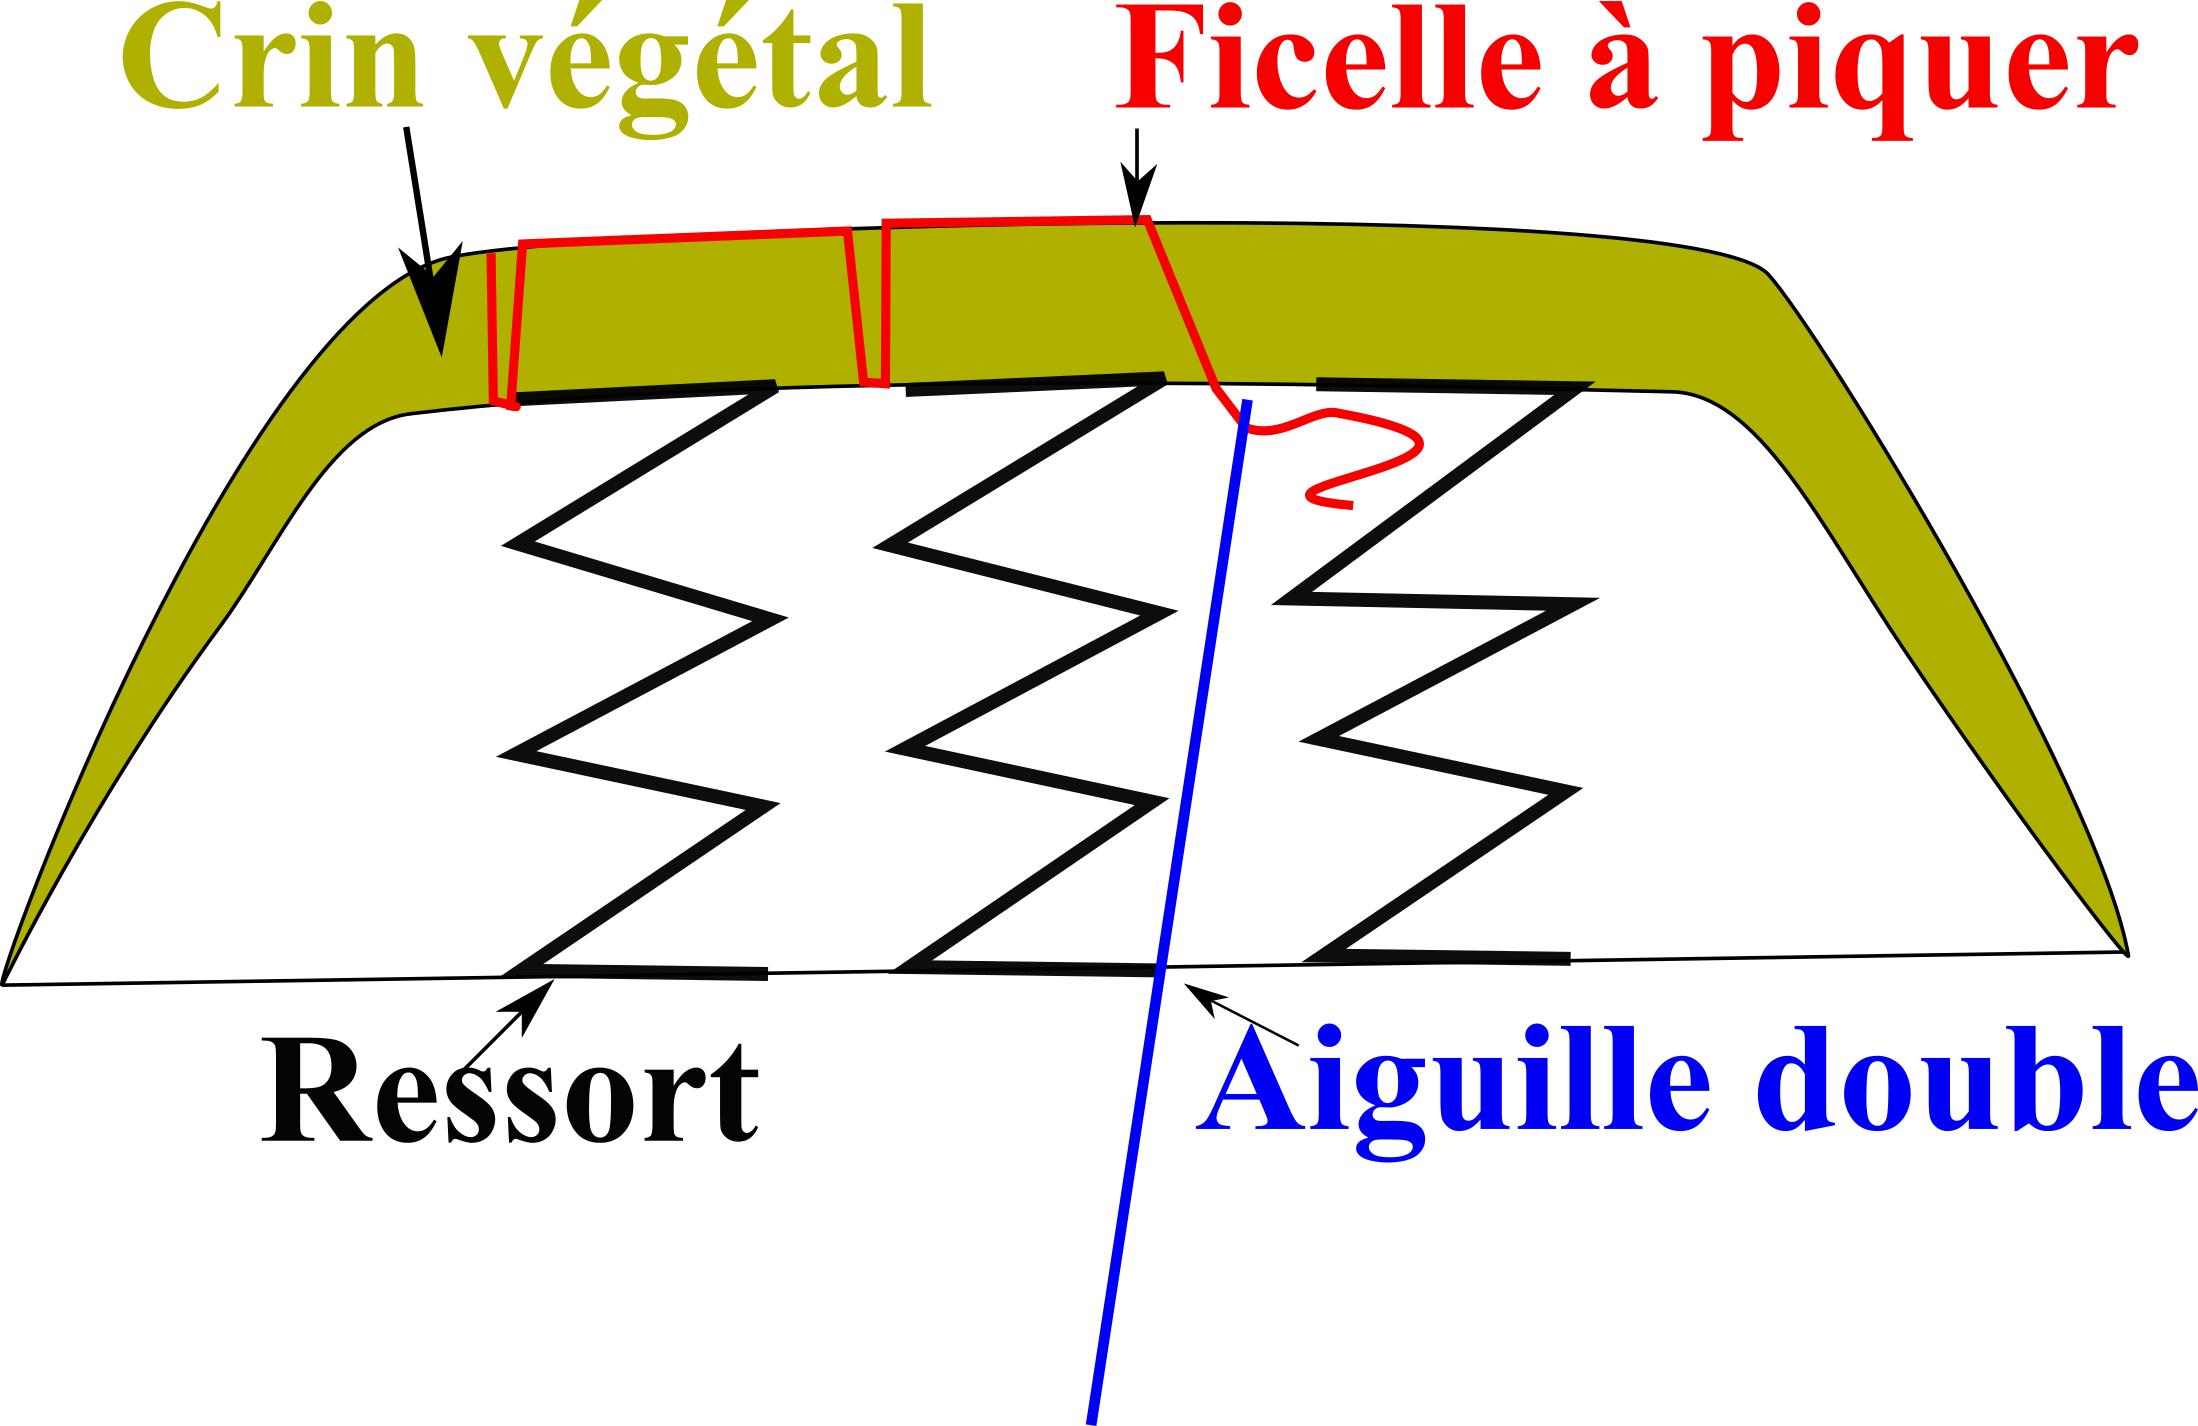
Refer to the diagram to make the foundation stitches. It is sometimes difficult to control the exit point on top of the stuffing. If so, simply re-stitch through this hole and come out 1 cm from the entry point.
For the folding back, remove the temporary upholstery tacks to finalize the placement of the wrapping cloth.
To adapt the cloth to a single corner of a stile or a peg, make a straight notch along the diagonal axis of the stile.
To adapt the cloth to both corners of a stile or a peg, make a Y-shaped notch, starting like a straight notch, then positioning the fork of the Y at 2cm from the stile, and continuing each of the two branches to each of the two corners.
Then plant the upholstery tacks, with the upholstery hammer, through the fold of the cloth (with a fold of about 3 cm) on the chamfer of the belt and the pegs, starting from the middle of the sides.
Particular care must be taken with the folding back near the corners, where the stuffing must closely follow any offsets and not present an excess or deficiency of horsehair. The corner of the stuffing must be perfectly plumb with the seat.
Foundation stitches and folding back #1
Use a large double-pointed needle.
Tool and Consumable:- Double needle
- Linen thread for stitching
Foundation stitches and folding back #2
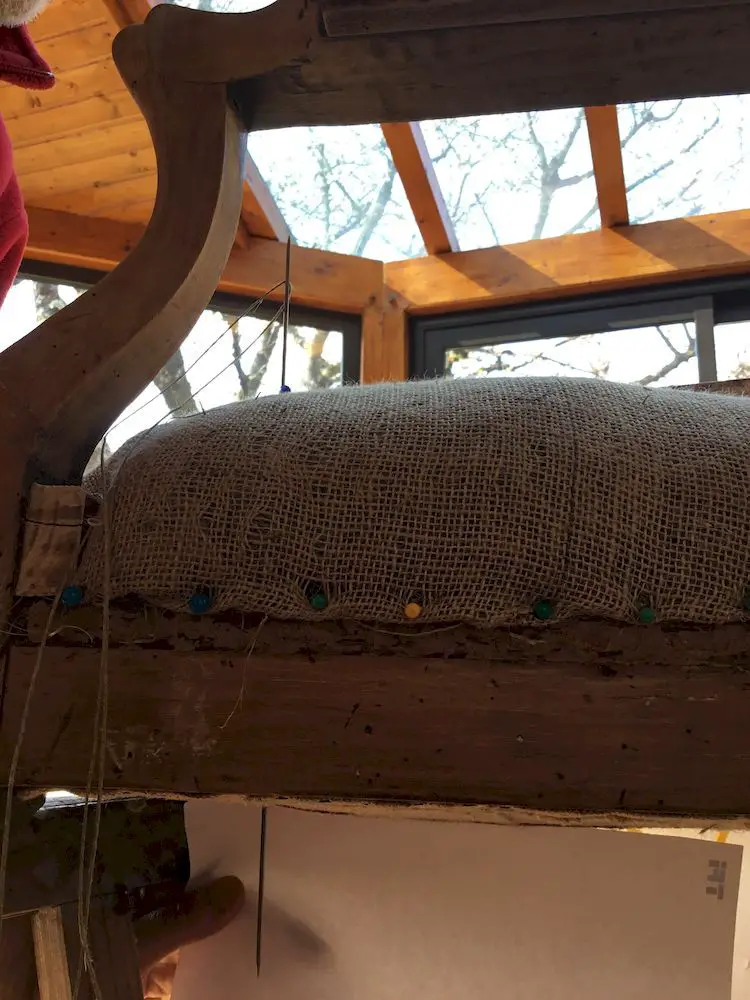
Push the needle into the first stitching point, at the front and on an edge.
Pass through the seat, down to under the webbing.
Foundation stitches and folding back #3
Stop the downward path when the upper end of the needle crosses the hessian.
Then bring the needle back up to the surface of the seat at 0.5 cm from the insertion point.
Foundation stitches and folding back #4
Continue for each stitching point following the red trace.
Leave about twenty cm of free cord at the two extreme points of the trace.
Tighten the cord at the foundation stitches to compress the horsehair between the two cloths.
Temporarily tie the cord at each end.
Plant the upholstery tacks on the frame to fix the wrapping cloth.
- Medium upholstery tacks
10. Stitching the holding points.
This is where the upholsterer does low sewing with cord...
Now that the shape is given, it must be consolidated using rows of holding stitches for the stuffing, stitched on the four sides of the seat. The number of rows affects the resistance but also the firmness, even the hardness, of the seat.
Before starting the stitching, work the edges of the stuffing with the horsehair puller to restore height to the stuffing by bringing back under the cloth the horsehair folded back by the previous step.
If necessary, start with stitching the corners.
The seat of spring seats most often includes two rows of front stitches and one row of tied back stitches for the roll.
The first front stitch is made with a straight triangular needle long enough to introduce the thread at the level of the upholstery tacks and bring it out on top, near the foundation stitches, about 9 cm from the vertical line of the belt. The stitches are spaced slightly less than 2 cm apart and pulled moderately tight.
The second front stitch is made with a shorter straight triangular needle to introduce the thread about 2 cm above the upholstery tacks and bring it out on top, about 3 cm in front of the previous line. The stitches are slightly tighter and pulled more firmly than the previous row.
The third stitching is for the roll using tied backstitches. The entry and exit points of the thread depend on the size and shape of the roll required by the style of the seat, which has evolved over time:
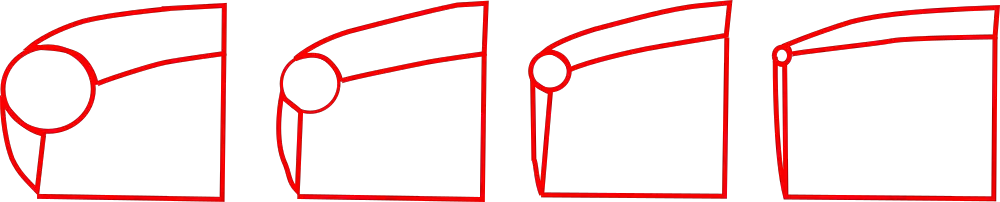
For the thinnest rolls, a fourth stitching in feston stitches can be added.
For wide rolls, the tied backstitch can be replaced with a hidden roll stitch.
Seat Stitching #1
Adjust the shape of the seat by varying the tension of the foundation stitches and leveling the horsehair with the horsehair comb.
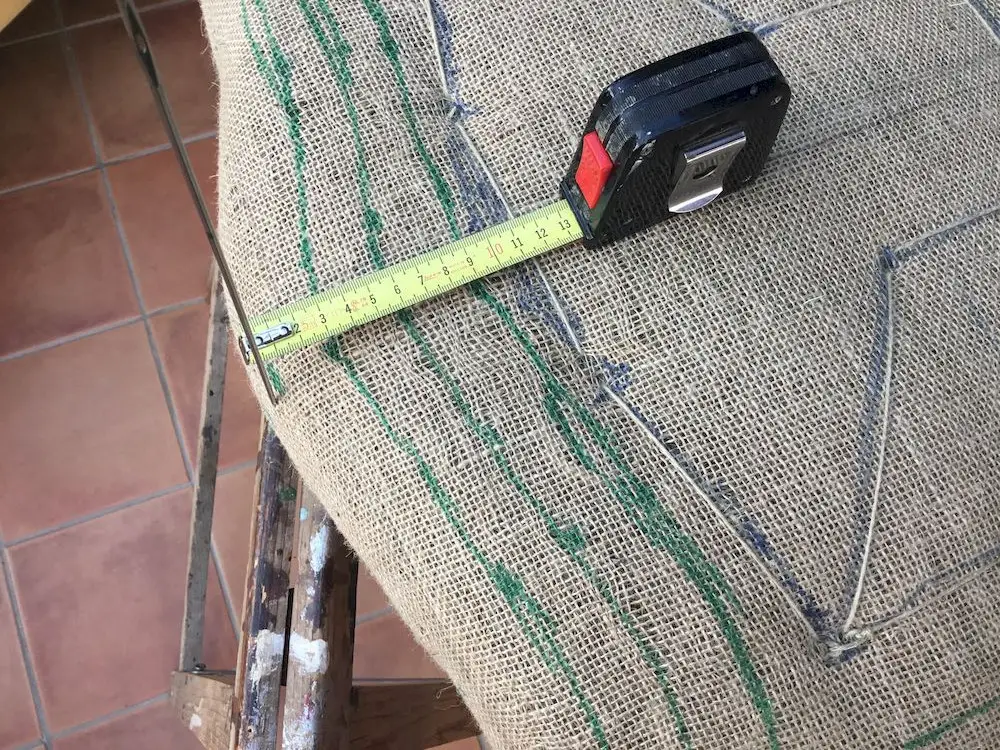
Trace three perimeters on the seat at 3, 6 and 9 cm from the edge.
Tool:- Horsehair comb
Seat Stitching #2
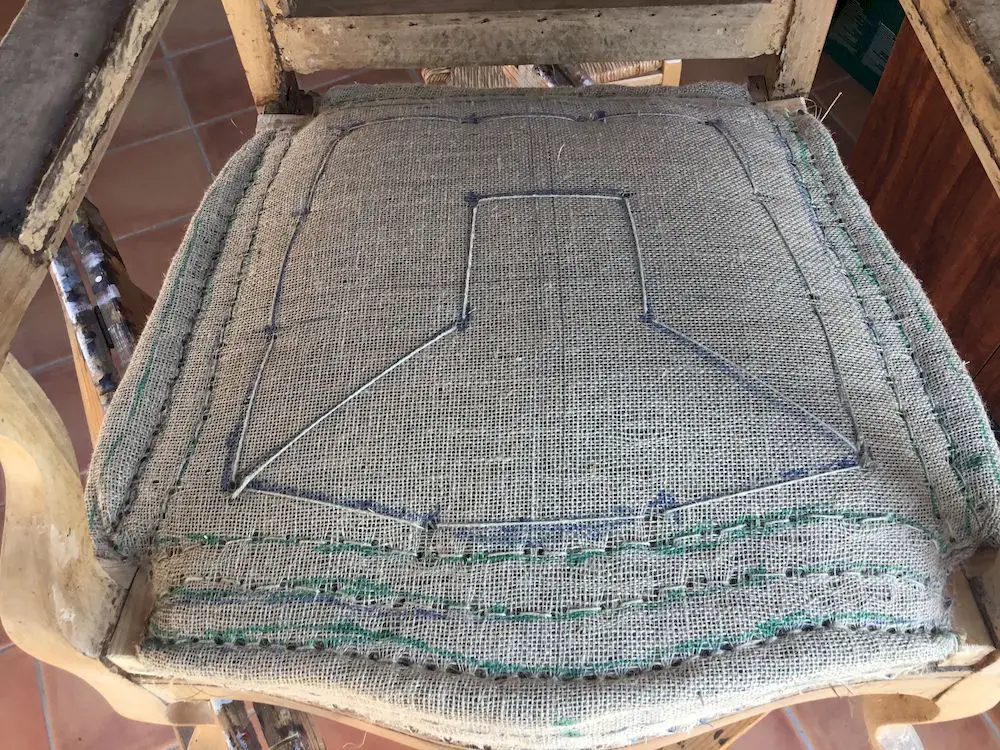
Start with the innermost perimeter.
Increase the tension of the stitches progressively from the 1st to the 3th stitching.
Tool & Consumable:- Curved needles of various sizes
- Linen thread for stitching
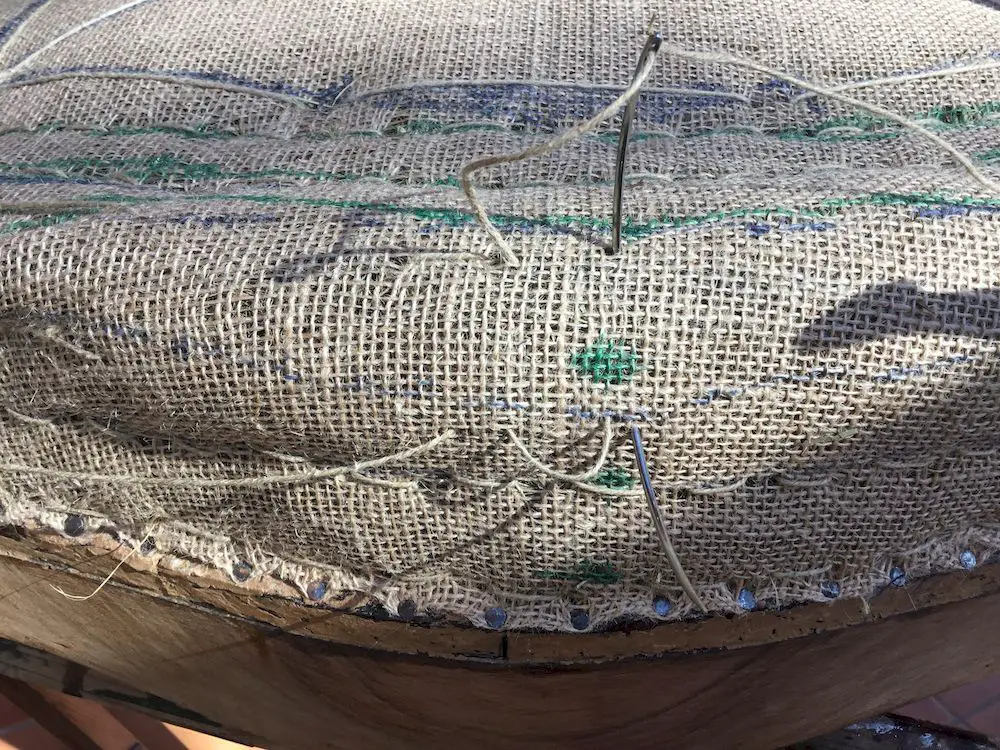
Seat Stitching #3
1st stitching: front stitch with exit at the level of the upholstery tacks.
2nd stitching: front stitch with exit one-third of the height up.
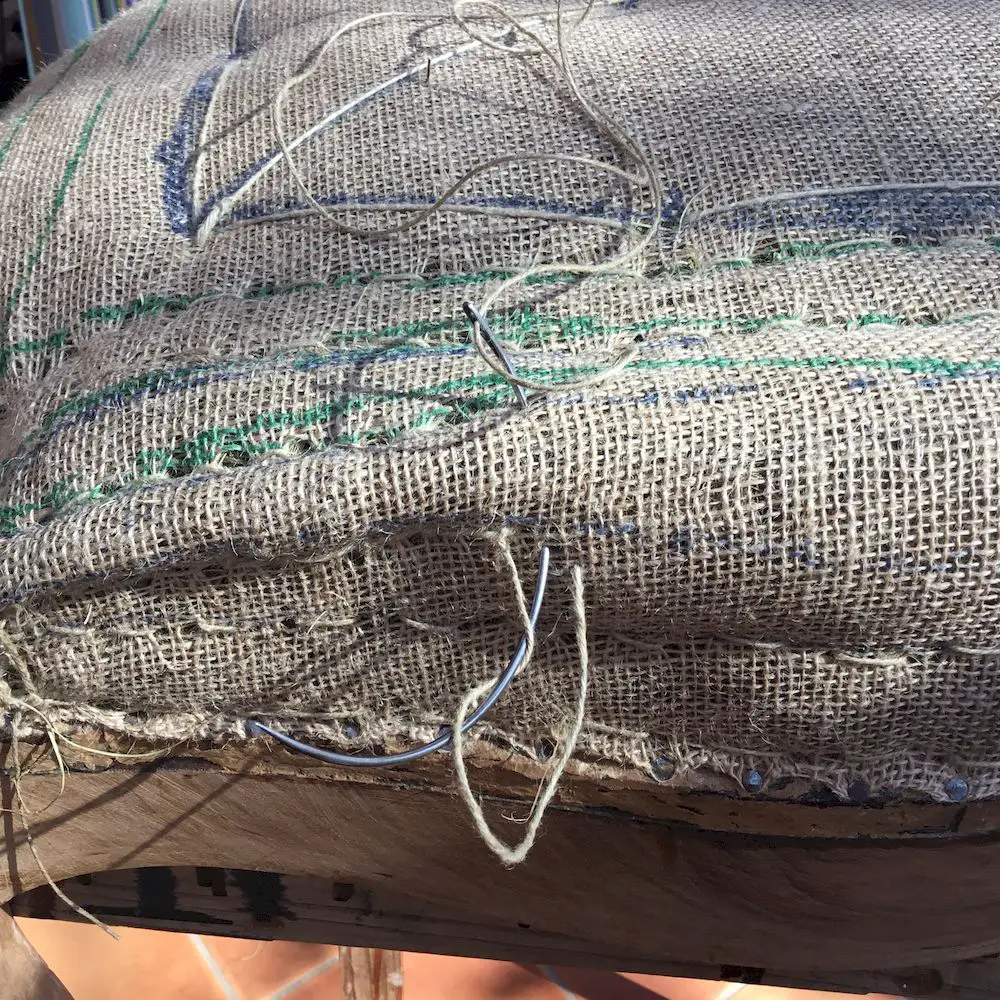
Seat Stitching #4
3rd stitching: tied backstitch or roll stitch with exit depending on the desired thickness of the roll.
Corner stitching
There are as many corner stitching procedures as there are upholsterers. I chose this one by chance and since it suits me well, I am presenting it to you.
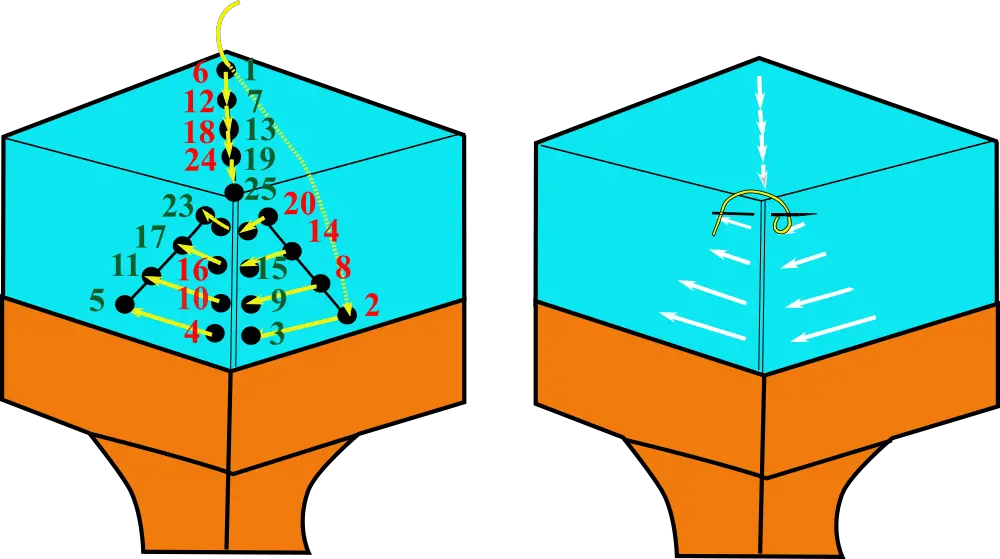
On each vertical face, starting from the upper point of the angle, trace the two diagonals at 45 degrees. On the horizontal face, trace a segment on the diagonal equal to the height of the trim.
Trace the points as shown in the diagram above (standard case). You can adjust the number based on the height of the trim.
Stitch the thread with a curved needle in ascending order of the numbers.
In the diagram, the green numbers correspond to a thread entry point into the trim, and the red numbers correspond to a thread exit point.
The solid yellow lines show the visible thread. The dashed path 1-2 is given as an example of a path within the trim; the continuation of this type of path is not shown to avoid cluttering the diagram.
You can start from any side of the corner, but make sure to alternate properly.
At 1, plan for a starting knot, and at 25, a finishing knot.
If the height of the trim is significant, you can double the stitches to ensure good hold over time.
Once the stitching from 1 to 25 is completed (21 and 22 are implied!), you can close the fold from top to bottom with a feston stitch shown in the second diagram.